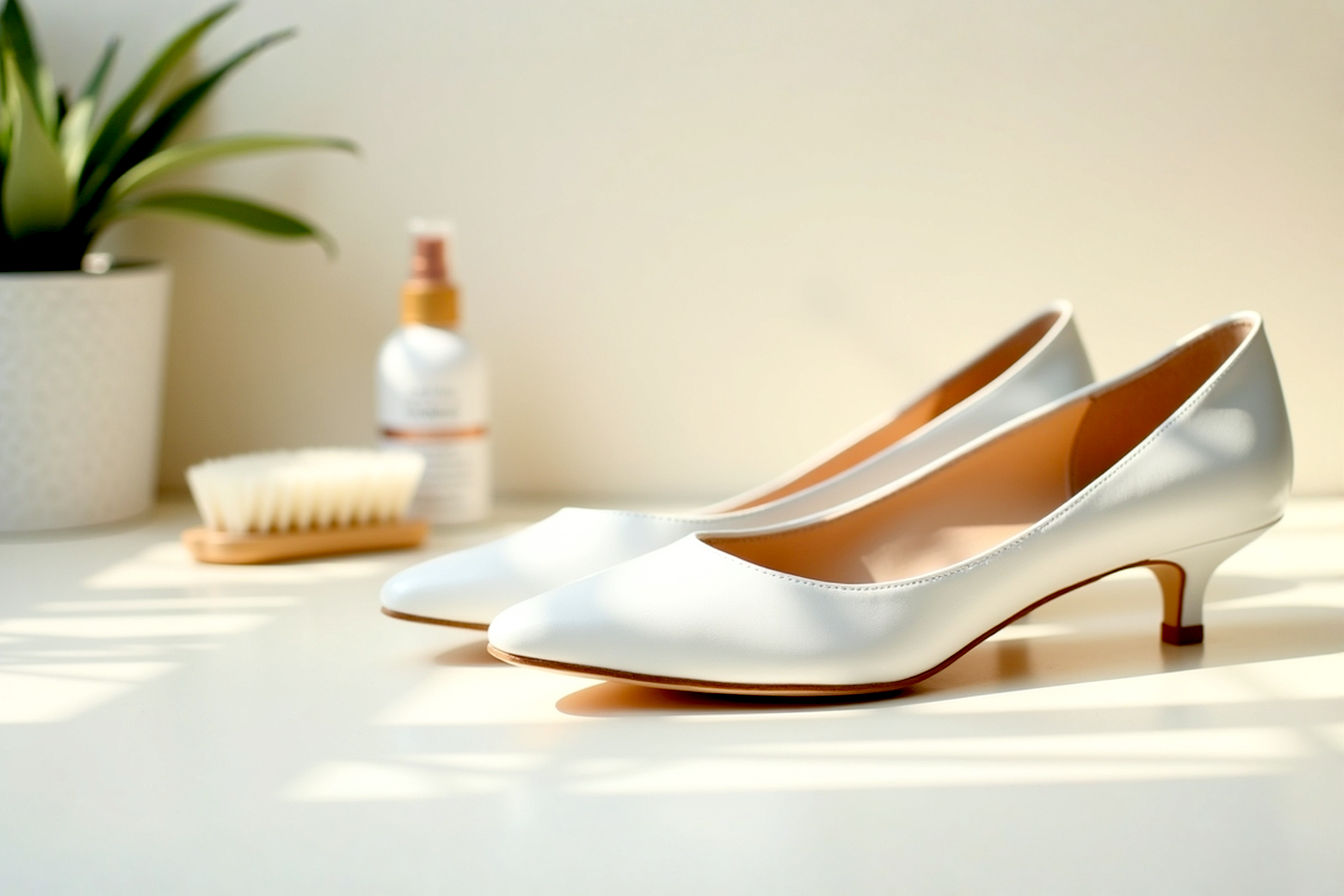
Scared of Scuffs? How to Keep Your White Kitten Heel Shoes Perfectly Clean
Don’t let scuffs ruin your stylish white kitten heels. This guide reveals how to clean, protect, and maintain their pristine look. From material-specific tips to proactive care, keep your favorite heels flawless.
This post may contain affiliate links. If you make a purchase through these links, we may earn a commission at no additional cost to you.
White kitten heel shoes are a fashion staple, offering elegance and a touch of sophistication to any outfit. Their dainty height and classic appeal make them perfect for everything from a sophisticated office look to a stylish evening out. Yet, owning a pair of these pristine beauties comes with a universal challenge: keeping them flawlessly clean. A single scuff or stain can quickly diminish their fresh appearance, turning chic into, well, not so chic.
But don’t worry! This comprehensive guide is designed to equip you with all the knowledge and practical tips you’ll need. We’ll dive deep into understanding different shoe materials, explore effective prevention strategies, and provide step-by-step cleaning instructions for even the most stubborn marks. By the time you’re done reading, you’ll feel confident tackling any dirt or scuff that dares to mar your beloved white kitten heels, ensuring they remain perfectly pristine for years to come.
Understanding Your White Kitten Heels: Materials Matter
Before you even think about cleaning your white kitten heels, it’s crucial to understand what they’re made of. Different materials react uniquely to water, cleaning solutions, and friction. What works wonders on leather could ruin a delicate suede, and vice versa. Knowing your shoe’s composition is the first and most critical step in proper care and maintenance. Ignoring this can lead to irreversible damage, turning a minor cleaning task into a footwear disaster.
The construction of most kitten heels typically involves an upper material, which is what you see and touch, and often a different material for the lining and sole. For cleaning purposes, the upper material is your primary concern, as it’s the part most exposed to dirt and damage.
Leather and Patent Leather: The Classic Choices
Leather and patent leather are highly popular choices for kitten heels due and for good reason. Leather offers durability, flexibility, and a luxurious feel, making it a timeless option. Its natural pores allow for breathability, but also mean it can absorb stains if not treated properly. Leather comes in various finishes, from smooth to textured, each requiring slightly different handling.
Patent leather, on the other hand, is a type of leather that has been treated with a plastic-like coating, typically polyurethane or acrylic. This coating gives it its signature high-gloss, reflective finish. The non-porous nature of patent leather makes it inherently more resistant to water and some stains compared to untreated leather. However, it’s prone to showing fingerprints, smudges, and can easily develop scuffs that appear as black marks, especially on white surfaces. The hard, glossy surface means that while it resists absorption, surface marks are highly visible.
When cleaning either, remember their distinct properties. Leather benefits from conditioning to maintain its suppleness, while patent leather needs specific attention to maintain its shine without scratching its delicate top layer.
Suede and Nubuck: The Delicate Darlings
Suede and nubuck are exceptionally stylish and luxurious materials, instantly elevating the look of any shoe. However, they are also arguably the most challenging white materials to keep clean. Suede is made from the underside of animal hide, giving it a soft, napped finish. Nubuck is similar but is made from the outside of the hide, which is then buffed to create a fine, velvety surface. Both materials are incredibly absorbent due to their open-pore, fibrous structure. This means they act like sponges, quickly soaking up liquids, dirt, and oil, making them highly susceptible to deep-set stains.
The delicate nature of suede and nubuck means you can’t simply wipe them down with a damp cloth like leather. Water can leave permanent marks, stiffen the nap, or even cause discoloration. Friction can flatten the nap, leading to shiny spots. Their vulnerability demands a specific dry-cleaning approach using specialized tools that gently lift dirt without damaging the fibers.
Synthetic Fabrics and Canvas: Versatility and Care
Synthetic fabrics and canvas offer a broad range of options for white kitten heels, from casual styles to more ornate designs. Synthetic fabrics, like polyester, nylon, or blends, are often chosen for their affordability, durability, and ability to be dyed vibrant colors. They can be woven to mimic natural fibers or create unique textures. The quality and weave of the synthetic material will influence its susceptibility to stains and ease of cleaning. Some synthetic fabrics are tightly woven and more resistant to absorption, while others can be quite porous.
Canvas, typically made from cotton or linen, is a sturdy, plain-woven fabric. It’s known for its breathability and somewhat relaxed aesthetic. While durable, canvas can easily absorb dirt and stains, making white canvas shoes a particular challenge to keep clean. The weave often traps dirt particles, requiring a bit more effort to dislodge them.
The care for these materials often involves gentle washing, but with specific precautions. While they might tolerate more moisture than suede, harsh scrubbing or incorrect detergents can damage their fibers, leading to pilling, fading, or weakening of the material. Understanding the specific type of fabric—whether it’s a tightly woven polyester or a classic cotton canvas—will inform your cleaning choices.
Embellishments and Hardware: Don’t Forget the Details
Many white kitten heels feature decorative elements such as rhinestones, delicate bows, metal buckles, studs, or intricate embroidery. These embellishments add character and charm, but they also introduce an extra layer of complexity to the cleaning process. Ignoring them can lead to tarnished hardware, loose crystals, or damaged fabric details.
For example, metal hardware can tarnish or rust if exposed to certain cleaning solutions or excessive moisture, especially if it’s not a high-grade stainless steel. Rhinestones are often glued on, and harsh chemicals or aggressive scrubbing can dissolve the adhesive, causing them to fall off. Delicate fabric bows can fray or lose their shape if not handled gently.
When cleaning your shoes, you’ll need to approach these details with care. This often means spot cleaning around them with a cotton swab or a very soft brush, using minimal moisture and specific cleaning agents that won’t react negatively with the embellishment material. It’s crucial to inspect each detail closely before you begin to determine the best approach, ensuring your entire shoe remains pristine, not just the main body.
Proactive Protection: The First Line of Defense Against Dirt
The old adage “prevention is better than cure” absolutely rings true for white kitten heels. While cleaning is essential, actively protecting your shoes before they get dirty is your most effective strategy. Think of proactive protection as building an invisible shield around your shoes, significantly reducing the likelihood of deep-set stains, scuffs, and general wear and tear. This approach saves you time and effort in the long run and helps maintain the pristine appearance of your footwear for a much longer period.
Waterproofing and Stain Protection Sprays
One of the most powerful tools in your arsenal against dirt and stains is a high-quality waterproofing and stain protection spray. These sprays work by creating a hydrophobic barrier on the surface of your shoes. When applied correctly, the microscopic polymers in the spray form an invisible layer that repels water, oils, and other liquids. Instead of soaking into the material, liquids bead up on the surface, making them easy to wipe away before they can cause a stain.
The technology behind these sprays involves the creation of a low-surface-energy coating. Materials with high surface energy (like many shoe fabrics) tend to attract and absorb liquids. By applying a spray that lowers the surface energy, the shoe becomes less attractive to liquid molecules, causing them to maintain their spherical droplet shape rather than spreading out and soaking in.
Application Process:
- Clean Your Shoes: Ensure your shoes are brand new or thoroughly cleaned and completely dry before application. Any existing dirt will be sealed in.
- Ventilate: Work in a well-ventilated area, preferably outdoors, as the sprays can have strong fumes.
- Shake Well: Shake the can vigorously for about 10-15 seconds to ensure the active ingredients are well mixed.
- Spray Evenly: Hold the can approximately 6-8 inches away from the shoe. Apply a light, even coat, moving the can back and forth to cover the entire surface. Avoid over-saturating the material, which can lead to residue or discoloration.
- Dry: Allow the first coat to dry completely, typically for 20-30 minutes, or as per the product instructions.
- Second Coat: Apply a second light, even coat for maximum protection. This layering builds a more robust barrier.
- Cure Time: Allow the shoes to dry and “cure” for at least 24 hours (or as recommended by the product) before wearing them. This allows the protective polymers to fully bond with the shoe material.
Product Recommendations (General Types):
- For Leather and Patent Leather: Look for sprays specifically designed for smooth leather that often contain conditioners to prevent drying. Silicone-based sprays are common.
- For Suede and Nubuck: Always use a spray formulated for these delicate materials. Fluoropolymer-based sprays are highly effective, as they create a breathable yet repellent barrier without altering the nap.
- For Synthetic and Canvas: Many general-purpose protector sprays work well, but always check the label to ensure compatibility. Look for “all-material” or “fabric protector” options.
Frequency: Reapply the spray every few weeks to every few months, depending on how often you wear the shoes and how harsh the conditions are. If water no longer beads up effectively, it’s time to reapply.
Anti-Scuff Heel Caps and Protectors
Kitten heels, by their very nature, feature a delicate, slender heel. This makes the heel tip particularly vulnerable to scuffs, scrapes, and wear, especially when walking on uneven surfaces or getting caught in grates. Anti-scuff heel caps and protectors are small, often clear or discreetly colored, caps that fit over the existing heel tip. They act as a sacrificial layer, absorbing the impact and abrasion that would otherwise damage your shoe’s actual heel.
These protectors are usually made from durable, flexible materials like rubber, silicone, or polyurethane. They are designed to be easily slipped over the heel tip, providing a protective cushion. Some designs even have a textured bottom to improve grip and reduce slipping. The concept is simple: it’s far easier and cheaper to replace a worn-out heel protector than to repair or replace a damaged heel.
Installation and Benefits:
- Select Correct Size: Heel protectors come in various sizes and shapes to accommodate different heel widths. Measure your heel tip for the best fit.
- Clean Heel: Ensure the heel tip is clean and free of debris for a secure fit.
- Slide On: Gently but firmly slide the protector over the heel tip until it sits snugly. It should not wobble or feel loose.
- Check Periodically: Inspect the protectors regularly for wear and tear. Replace them once they show significant signs of damage.
Benefits:
- Scuff Prevention: Directly protects the heel from everyday scuffs and scrapes.
- Increased Durability: Extends the life of your original heel tips.
- Improved Grip: Some protectors offer enhanced traction, reducing slips.
- Noise Reduction: Can dampen the clicking sound of heels on hard surfaces.
- Cost-Effective: Much cheaper to replace protectors than repair heels.
Regular Dusting and Wiping: Daily Habits
This might seem overly simple, but consistent, gentle cleaning is a powerful proactive measure. Regularly dusting and wiping your white kitten heels prevents dirt and grime from building up and bonding with the material. The longer dirt sits on a shoe, especially a white one, the more likely it is to settle into the fibers or pores, making it much harder to remove later. This daily habit transforms major cleaning tasks into minor, quick touch-ups.
Think of it like dusting your furniture. A quick wipe daily prevents a thick layer from forming, whereas leaving it for weeks means you’ll need a much more intensive cleaning. The same principle applies to your shoes.
Recommended Tools:
- Microfiber Cloth: A soft, clean microfiber cloth is ideal. Its unique fiber structure effectively traps dust and small particles without scratching delicate surfaces.
- Soft Brush: A shoe brush with soft bristles (like a horsehair brush for leather or a specialized suede brush for suede) can help dislodge loose dirt and maintain the material’s nap.
How to Incorporate into Your Routine:
- After Every Wear: As soon as you take off your white kitten heels, give them a quick wipe-down. Use a dry microfiber cloth to remove any surface dust, light dirt, or minor smudges.
- Spot Check: Quickly check for any small marks or fresh scuffs. If you spot them early, they’re often much easier to remove with a gentle rub or a specialized eraser before they set.
- Before Storage: Before putting your shoes away for the day or longer, ensure they are clean and dry. This prevents any lingering dirt from permanently settling into the material or attracting pests.
This simple, daily habit is incredibly effective for maintaining the pristine look of your white kitten heels, reducing the need for more intensive cleaning sessions.
Cleaning Your White Kitten Heels: A Step-by-Step Guide
Even with the best preventative measures, white shoes will inevitably encounter dirt and scuffs. When they do, knowing how to clean them properly is crucial. This section provides detailed, step-by-step instructions tailored to different materials and stain types. The general principle remains: always start with the gentlest method possible and gradually increase intensity only if necessary. And remember, patience is key.
Patch Testing Importance: Before applying any cleaning solution to your entire shoe, always perform a patch test. Choose an inconspicuous area, such as a small spot on the inside of the strap, near the sole, or on the underside of the tongue. Apply a tiny amount of the cleaning solution and let it sit for a few minutes. Check for any adverse reactions like discoloration, material damage, or residue. If the area looks good, proceed with cleaning the rest of the shoe. If not, try a different method or solution. This simple step can save your shoes from irreversible damage.
Essential Cleaning Tools and Solutions
Having the right tools on hand makes the cleaning process much more efficient and effective. Avoid abrasive materials that can scratch or damage delicate white finishes.
- Soft-Bristled Brushes:
- Shoe Brush: A dedicated shoe brush (often horsehair for leather) for general dusting and gentle scrubbing.
- Suede Brush: Essential for suede and nubuck, designed to lift the nap and remove dry dirt without damaging the fibers.
- Old Toothbrush: Perfect for reaching tight spots, cleaning crevices, and gently scrubbing small areas.
- Clean, Soft Cloths:
- Microfiber Cloths: Highly absorbent and non-abrasive, ideal for wiping, buffing, and drying. Keep several on hand.
- Cotton Cloths: Old cotton T-shirts or soft towels work well for general wiping.
- Mild Cleaning Solutions:
- Mild Soap/Dish Soap: A small amount of gentle, colorless liquid dish soap (like dish soap without dyes or harsh detergents) mixed with water.
- Specialized Shoe Cleaners: Products formulated for specific materials (leather cleaner, suede cleaner, fabric shoe cleaner) are often the safest and most effective.
- Erasers:
- White Rubber Eraser: For light scuffs on leather or patent leather.
- Suede Eraser: Specifically designed to lift marks from suede and nubuck.
- Other Useful Items:
- Small Bowl: For mixing cleaning solutions.
- Cotton Swabs/Q-tips: For precise application on small areas or around embellishments.
- Paper Towels: For blotting excess moisture or absorbing stains.
- Shoe Trees or Paper Stuffing: To maintain shoe shape during drying.
Cleaning Leather and Patent Leather White Kitten Heels
Leather and patent leather, while durable, still require specific care to maintain their pristine white appearance and prevent cracking or dullness.
Basic Cleaning for Surface Dirt
For everyday dust, light dirt, and minor smudges, a simple wipe-down is usually sufficient.
- Remove Loose Dirt: Use a dry, soft-bristled brush (like a horsehair shoe brush) to gently brush off any loose dust, dirt particles, or debris from the entire shoe, including the heel.
- Damp Wipe: Slightly dampen a clean microfiber cloth with plain water. Wring it out thoroughly so it’s barely damp, not wet.
- Gentle Wipe: Gently wipe the entire surface of the leather or patent leather. For patent leather, use a circular motion to buff away smudges and fingerprints.
- Dry: Immediately follow with a dry microfiber cloth to absorb any remaining moisture and buff the surface dry. This prevents water spots, especially on patent leather.
Tackling Scuffs and Minor Marks
White leather and patent leather are notorious for picking up dark scuff marks. These are often residue from other surfaces rather than deep damage to the shoe itself.
- For Leather:
- White Rubber Eraser: For light scuffs, gently rub a clean white rubber eraser (the kind you use for pencils, ensure it’s not colored) over the scuff mark. The eraser’s friction helps lift the superficial dirt. Rub in one direction rather than back and forth. Wipe away eraser debris with a clean cloth.
- Diluted White Vinegar: For slightly more stubborn scuffs or grime, mix equal parts white vinegar and water in a small bowl. Dip a cotton swab or the corner of a clean cloth into the solution, wring out excess, and gently dab and wipe the scuff. The mild acidity of the vinegar helps break down dirt. Follow immediately with a wipe of plain water on a clean cloth, then dry.
- Specialized Leather Cleaner: For tougher marks, use a small amount of a cleaner specifically designed for white leather. Apply it as directed by the product, typically with a soft cloth, using gentle circular motions. Always wipe off excess and dry.
- For Patent Leather:
- Rubbing Alcohol (Diluted): For black scuff marks on patent leather, dip a cotton swab in rubbing alcohol (isopropyl alcohol). You can dilute it with water to a 50/50 ratio, or even 25% alcohol for lighter marks. Gently rub the scuff mark until it lifts. The alcohol acts as a solvent for the rubber residue. Crucially, do this very quickly and sparingly, as excessive alcohol can potentially strip the glossy finish over time. Immediately buff the area with a clean, dry microfiber cloth.
- Petroleum Jelly: For minor scuffs and to restore shine, apply a tiny dab of petroleum jelly onto a clean cloth and gently rub it over the scuff. Buff vigorously with a separate clean, dry cloth until the mark disappears and the shine returns. The petroleum jelly fills in microscopic scratches and creates a smooth surface.
- White Eraser: Similar to leather, a clean white rubber eraser can lift light surface scuffs on patent leather.
Deep Cleaning and Conditioning
For shoes that need a more thorough clean, or after extensive stain removal, a deeper approach is needed.
- Prepare Solution: Mix a few drops of mild, colorless liquid dish soap with warm water in a small bowl. The water should be slightly sudsy, not heavily foamy.
- Apply Gently: Dip a clean, soft cloth into the solution, wring it out very thoroughly so it’s only damp.
- Wipe Down: Gently wipe the entire leather surface in small sections. Avoid saturating the leather. For patent leather, focus on gentle, even strokes.
- Rinse (Wipe Clean): Dampen a separate clean cloth with plain water and wipe down the entire shoe again to remove any soap residue. It’s crucial to remove all soap, as it can dry out leather or leave a dull film.
- Dry: Immediately dry the shoes with a clean, dry microfiber cloth.
- Conditioning (Leather Only): Once the leather is completely dry (allow a few hours), apply a small amount of leather conditioner. This step is vital for natural leather as cleaning can strip its natural oils. Conditioner replenishes moisture, keeps the leather supple, and prevents cracking. Apply with a clean cloth, rub in gently, and buff off any excess. Do not use conditioner on patent leather, as it will only sit on the non-porous surface.
Cleaning Suede and Nubuck White Kitten Heels
Cleaning white suede and nubuck requires a different strategy. These materials are sensitive to moisture and benefit most from dry cleaning methods.
Dry Cleaning Methods: Brushing and Erasers
These are your first line of defense for suede and nubuck, designed for everyday dirt and light scuffs.
- Allow to Dry: If your suede/nubuck shoes are muddy or wet, let the dirt dry completely. Attempting to clean wet suede will only push the dirt deeper into the fibers.
- Suede Brush: Using a specialized suede brush, gently brush the entire surface of the shoe. Always brush in one direction to lift the nap and remove loose dirt and dust. For stubborn spots, you can apply slightly more pressure and brush in short, firm strokes back and forth to dislodge particles, then brush in one direction again to restore the nap.
- Suede Eraser: For scuff marks, dark spots, or dried-on dirt, use a suede eraser. Gently rub the eraser over the mark. The eraser’s abrasive action helps lift the dirt from the nap without damaging the material. Brush away the residue with your suede brush.
Spot Treatment for Tough Stains
When dry methods aren’t enough, specific spot treatments are needed for suede/nubuck, but always with extreme caution.
- For Oil and Grease Stains:
- Talcum Powder/Cornstarch: Immediately blot the stain with a clean cloth to absorb as much oil as possible. Then, generously sprinkle talcum powder, cornstarch, or even baby powder directly onto the stain. The powder will absorb the oil. Let it sit for several hours, ideally overnight, to give it time to work.
- Brush Off: After the powder has absorbed the oil, gently brush it off with a suede brush. Repeat if necessary.
- For Water Stains:
- Oddly, the best way to deal with a water stain on suede is often to dampen the entire affected area evenly with a very fine mist of water (using a spray bottle). Then, blot with a clean cloth and allow to air dry completely, brushing the nap occasionally as it dries. This helps to even out the water mark.
- Specialized Suede Cleaners: For persistent stains that resist dry methods, invest in a dedicated suede cleaner. These are usually foam or spray solutions designed to be low-moisture.
- Apply: Spray or apply a small amount onto a clean cloth (not directly onto the shoe, unless specified by product instructions).
- Dab: Gently dab the stained area with the damp cloth. Do not rub vigorously, as this can damage the nap.
- Blot Dry: Blot with a separate clean, dry cloth to absorb excess moisture.
- Dry and Brush: Allow the area to air dry completely, then use your suede brush to restore the nap.
Avoidance of Water: As a general rule, avoid applying liquid water directly to suede or nubuck unless it’s a specific suede cleaner designed for this purpose, or you are attempting to even out a water stain with a fine mist as described above. Water can leave permanent rings and stiffen the material.
Cleaning Synthetic Fabric and Canvas White Kitten Heels
These materials are generally more tolerant of water and mild cleaning solutions than suede, but still require careful handling to prevent damage and maintain their white color.
Gentle Hand Washing Techniques
For most synthetic fabric and canvas kitten heels, gentle hand washing is the safest and most effective method.
- Remove Loose Dirt: Use a soft brush (like an old toothbrush) to brush away any loose dirt or debris from the surface.
- Prepare Solution: In a small bowl, mix a few drops of mild, colorless liquid laundry detergent or dish soap with cool or lukewarm water. Stir to create a slightly sudsy solution.
- Apply and Scrub: Dip a soft brush (like an old toothbrush) or a clean cloth into the solution. Gently scrub the entire fabric surface of the shoe in small circular motions. Pay extra attention to stained areas. Avoid saturating the shoe completely, especially if it has cardboard inserts or delicate internal structures.
- Rinse: Dampen a separate clean cloth with plain water and thoroughly wipe down the shoes to remove all soap residue. It’s crucial to rinse completely to prevent yellowing or stiffness from dried soap. Repeat wiping with a clean, damp cloth until no suds appear.
- Blot Dry: Use a clean, dry towel to gently blot the entire shoe, absorbing as much moisture as possible.
- Air Dry: Stuff the shoes with clean paper towels or newspaper to help them retain their shape and absorb internal moisture. Air dry them in a well-ventilated area away from direct sunlight or heat. Change the paper stuffing periodically if it becomes very damp.
Machine Washing (If Applicable) and Precautions
Machine washing is generally NOT recommended for most kitten heels due to their delicate structure, glues, and embellishments. The agitation can damage the heel, upper, or cause elements to detach. However, for very simple, unadorned canvas or robust synthetic fabric kitten heels that explicitly state they are machine washable (check the care tag), you can consider it with extreme caution.
Precautions if Machine Washing:
- Remove Laces/Insoles: If applicable, remove any laces or removable insoles. Clean them separately.
- Mesh Laundry Bag: Always place the shoes inside a mesh laundry bag. This protects them from harsh tumbling and prevents them from banging against the machine drum.
- Gentle Cycle: Use the “delicate” or “gentle” cycle with cold water. Hot water can cause shrinking, fading, or damage to adhesives.
- Mild Detergent: Use a small amount of mild liquid detergent, preferably one designed for delicate fabrics. Avoid bleach unless the shoes are specifically made for it and are extremely durable (very rare for kitten heels).
- Add Towels: Place a few old towels in the washing machine with the shoes. This helps to balance the load and reduce the impact of the shoes tumbling.
- No Dryer: NEVER put white kitten heels in a tumble dryer. The heat can melt glues, warp materials, cause shrinking, or damage the heel. Always air dry them as described above.
Addressing Stubborn Stains: A Troubleshooting Guide
Some stains require targeted solutions. Always test these methods on an inconspicuous area first.
Ink Stains
Ink stains are challenging, but often respond to specific solvents.
- Rubbing Alcohol (Isopropyl Alcohol): For leather, patent leather, and some synthetics, lightly dab a cotton swab dipped in rubbing alcohol onto the ink stain. Dab, don’t rub, to lift the ink rather than spreading it. As the ink transfers to the swab, use a fresh part of the swab. Follow immediately with a clean, damp cloth to remove alcohol residue, then dry.
- Hairspray: For some fabric stains, a quick spray of hairspray (which contains alcohol) can help. Spray a small amount directly onto the stain, let it sit for a few seconds, then blot with a clean cloth. Repeat if needed, then clean the area with mild soap and water.
- Specialized Ink Removers: For tough ink stains on leather, consider a specialized leather ink remover, but use it with extreme caution and only as directed.
Oil and Grease Stains
These stains can be tricky because oil penetrates fibers easily.
- Talcum Powder/Cornstarch: For all materials, especially suede/nubuck and canvas, this is your best first line of defense. As mentioned earlier, immediately blot any fresh oil, then generously cover the stain with powder. Let it sit for several hours to absorb the oil, then brush or wipe off. Repeat if necessary.
- Mild Dish Soap (for Leather/Synthetics/Canvas): For leather, patent leather, synthetics, and canvas, mix a tiny drop of colorless dish soap with water. Dip a clean cloth into the solution (very lightly), and gently dab the oily stain. The soap’s degreasing properties help break down the oil. Wipe off with a clean, damp cloth and dry immediately.
Mud and Dirt Stains
The key here is patience.
- Let it Dry: If your white kitten heels are covered in mud, DO NOT try to wipe it off while wet. This will only smear the mud and push it deeper into the material. Let the mud dry completely.
- Brush Off: Once dry, gently brush off the dried mud with a soft brush (or a suede brush for suede). The dried mud particles will often crumble off easily.
- Follow with General Cleaning: After removing the bulk of the dried mud, proceed with the appropriate cleaning method for your shoe’s material (leather cleaner, fabric wash, etc.) to remove any residual staining.
Yellowing
White shoes can sometimes develop a yellowish tint over time, often due to oxidation, sun exposure, or improper cleaning.
- Baking Soda Paste: For canvas and synthetic fabrics, mix baking soda with a small amount of water to form a thick paste. Apply the paste directly to the yellowed areas and let it sit for a few hours in indirect sunlight. The baking soda’s mild abrasive and whitening properties can help. Brush off the dried paste and rinse.
- Diluted Bleach (Extreme Caution!): For durable white canvas shoes only, a highly diluted bleach solution (1 part bleach to 10 parts water) can be used. This should be a last resort and used with extreme caution, as bleach can weaken fibers and cause irreversible damage or further yellowing if not rinsed completely. Apply with a cotton swab to the yellowed area, let sit for only a minute, then rinse thoroughly with plain water and blot dry. Never use bleach on leather, patent leather, suede, or delicate synthetics.
- White Shoe Polish/Cream: For yellowing on leather, a white shoe polish or cream can cover up light yellowing and restore the bright white. This is a cosmetic fix rather than a cleaning method.
Drying and Finishing Touches: The Often-Overlooked Steps
Proper drying is just as important as proper cleaning. Rushing this step or drying shoes incorrectly can lead to new problems like mildew, warping, shrinkage, or even further discoloration. Finishing touches also ensure your shoes look their best and are ready for their next outing.
Air Drying Best Practices
Always air dry your white kitten heels. Heat from direct sunlight, radiators, or tumble dryers can be incredibly damaging to shoe materials, especially delicate ones.
- Remove Excess Moisture: After cleaning, use a clean, dry microfiber towel to gently blot the entire shoe, absorbing as much surface moisture as possible.
- Stuff for Shape: Lightly stuff the inside of each shoe with clean paper towels or unprinted newspaper. This helps absorb internal moisture and, crucially, helps the shoes retain their original shape as they dry, preventing shrinking or warping. Change the paper stuffing every few hours if it becomes saturated.
- Ventilated Area: Place your shoes in a well-ventilated room, away from direct heat sources (like radiators, hair dryers) and direct sunlight. A cool, dry place is ideal. Good airflow is essential to prevent mildew growth.
- Position: If possible, position them so that air can circulate around all sides. You can use shoe trees (unvarnished wood is best as it absorbs moisture) for added shape retention.
- Patience: Allow ample time for the shoes to dry completely. This can take anywhere from 12 hours to 2 days, depending on how wet they got and the humidity of your environment. Do not rush this process. Wearing damp shoes can damage the material and foster bacterial growth.
Conditioning and Polishing
These steps are crucial for certain materials to maintain their integrity and appearance after cleaning.
- Conditioning (Leather Only):
- Once your leather kitten heels are completely dry after cleaning, it’s essential to condition them. Cleaning agents can strip natural oils from leather, leading to dryness and cracking.
- Apply a small amount of high-quality leather conditioner with a clean, soft cloth. Gently massage it into the leather in circular motions. This replenishes moisture, keeps the leather supple, and helps prevent future cracking.
- Allow the conditioner to absorb for the recommended time (check product instructions), then buff off any excess with a clean, dry cloth to restore a gentle sheen.
- Polishing (Leather & Patent Leather):
- For leather, if you want a polished look or need to cover minor imperfections, apply a white shoe polish or cream. Apply a thin, even coat, let it dry briefly, then buff to a shine with a clean cloth or shoe brush.
- For patent leather, to restore its high-gloss finish, you don’t use traditional polish. Instead, after cleaning, a tiny amount of glass cleaner (ammonia-free) on a microfiber cloth can be used to buff away smudges and enhance the shine. Alternatively, a small amount of petroleum jelly buffed off with a clean cloth can also restore luster.
Deodorizing and Freshening
Even the cleanest shoes can sometimes develop odors.
- Baking Soda: Sprinkle a generous amount of baking soda inside each shoe. Let it sit overnight, or for at least 8 hours. The baking soda will absorb odors. Tap out the excess powder before wearing.
- Shoe Deodorizers/Inserts: Commercial shoe deodorizers or charcoal inserts are also effective at absorbing moisture and neutralizing odors. Place them inside your shoes when not in use.
- Tea Bags: Unused tea bags (black tea works well due to tannins) can also absorb odors. Place a few in each shoe overnight.
Long-Term Care and Storage: Maintaining Pristine Condition
How you store your white kitten heels when you’re not wearing them plays a significant role in their long-term cleanliness and overall condition. Proper storage protects them from environmental damage, dust accumulation, and potential discoloration, ensuring they remain ready to wear and as pristine as the day you bought them.
Ideal Storage Environment
The environment where you store your shoes can greatly impact their longevity and appearance.
- Cool, Dry Place: Store white kitten heels in a cool, dry area. Extreme temperatures (hot attics, cold garages) can damage materials, causing leather to dry out and crack, or synthetics to degrade. Humidity can lead to mildew, mold, and yellowing, especially on white fabrics.
- Avoid Direct Sunlight: Direct sunlight is a major culprit for yellowing on white materials and can also fade colors or degrade delicate fabrics over time. Store shoes in a dark or shaded closet.
- Good Air Circulation: While avoiding humidity, ensure there’s enough air circulation to prevent staleness and moisture buildup. Don’t pack shoes too tightly together in sealed containers without ventilation.
Using Shoe Bags and Boxes
These simple accessories provide essential physical protection for your footwear.
- Dust Bags: Many quality shoes come with individual dust bags, usually made of soft flannel or cotton. Always store your white kitten heels in these bags. They protect against dust accumulation, which can cause subtle discoloration over time, and prevent accidental scuffs or marks from other items in your closet.
- Original Boxes: If you have the original shoe boxes, use them! They provide structural support and protect against dust, light, and accidental crushing. Make sure the boxes are clean and dry. If you don’t have the original, use clean, breathable storage boxes specifically designed for shoes. Avoid plastic containers that seal too tightly, as they can trap moisture and odors.
- Acid-Free Tissue Paper: For extra protection, especially if shoes are stored in boxes, stuff the toes with acid-free tissue paper. This helps maintain the shoe’s shape and prevents creasing. Avoid newspaper, as the ink can transfer and stain your white shoes.
Rotating Your Footwear Collection
While you might have a favorite pair of white kitten heels, wearing the same pair every single day can accelerate wear and tear.
- Allow Them to Rest: Give your shoes at least 24 hours to “rest” between wears. This allows any absorbed moisture (from sweat or humidity) to evaporate completely. Materials like leather need time to decompress and regain their shape after being worn.
- Ventilation: Resting shoes in an open, airy space (but away from direct sunlight) allows them to fully air out, preventing odors and mildew.
- Reduces Strain: Rotating your shoes distributes the wear across different pairs, extending the life of each individual pair. You’ll reduce the frequency of intense cleaning needed for any single pair if they aren’t constantly exposed to dirt.
Common Mistakes to Avoid When Cleaning White Kitten Heels
Even with the best intentions, it’s easy to make mistakes that can harm your white kitten heels. Being aware of these pitfalls can save you from irreversible damage and frustration.
- Using Harsh Chemicals: This is arguably the biggest mistake. Bleach (unless extremely diluted for specific canvas and as a last resort), abrasive cleansers, or strong household cleaners like ammonia-based products or oven cleaner can permanently damage delicate materials. They can cause discoloration, strip natural oils from leather, dissolve glues, or break down synthetic fibers. Stick to mild soaps, specialized shoe cleaners, or gentle household solutions like diluted vinegar.
- Over-Wetting the Shoes: Saturating shoes with water, especially leather, suede, or those with internal cardboard components, can lead to numerous problems. It can cause materials to swell, warp, crack (leather), or stain (suede). It also prolongs drying time, increasing the risk of mold and mildew. Always use minimal moisture and blot, rather than soak.
- Skipping Patch Tests: As emphasized earlier, skipping the patch test is a huge risk. A cleaning solution that works on one material or type of shoe might react badly with another. Always test in an inconspicuous area first to prevent widespread damage.
- Improper Drying: Placing shoes in direct sunlight or using heat sources (hair dryers, radiators) to speed up drying can cause leather to crack, shrink, or become stiff. It can also melt adhesives, warp synthetic materials, and cause yellowing on white fabrics. Always air dry in a cool, well-ventilated area, using paper stuffing to maintain shape.
- Ignoring Care Labels: While many shoes don’t come with explicit care labels, if yours does, pay attention to it. Manufacturers often provide specific instructions for their materials. Ignoring these can lead to voided warranties or damaged shoes.
- Rubbing Stains Vigorously: Especially on suede or delicate fabrics, aggressive rubbing can push the stain deeper, spread it, or damage the material’s surface (like flattening the nap on suede or causing pilling on fabric). Always dab, blot, or use gentle, directed strokes.
- Using Colored Cloths: When cleaning white shoes, always use clean, white or light-colored cloths. Dark-colored cloths can transfer dye onto your white shoes, creating a new, unwanted stain.
- Forgetting the Heels/Soles: The main body of the shoe gets all the attention, but the heel and sole can also accumulate significant dirt and scuffs. Cleaning these areas with an old toothbrush and mild soap ensures the entire shoe looks fresh.
- Waiting Too Long to Clean Stains: The longer a stain sits, especially on white material, the harder it is to remove. Fresh stains are always easier to tackle. Address spills and marks as soon as possible.
- Storing Dirty Shoes: Putting away shoes that are still dirty or damp creates an environment for mold, mildew, and permanent discoloration. Always ensure your shoes are clean and completely dry before storing them.
Conclusion: Confidence in Your Clean White Kitten Heels
White kitten heel shoes are more than just footwear; they’re a statement of style, elegance, and meticulous attention to detail. While their pristine white color might seem daunting to maintain, with the right knowledge and consistent effort, you can conquer any dirt or scuff that comes your way.
We’ve explored how understanding your shoe’s material – be it supple leather, delicate suede, or versatile synthetic fabric – is the foundational step to proper care. We’ve highlighted the power of proactive protection, from waterproofing sprays that create invisible barriers to the simple yet effective daily habit of wiping down your shoes. And we’ve walked through detailed, step-by-step cleaning methods for various materials and stubborn stains, equipping you with the practical skills to restore their brilliance.
Remember the importance of gentle methods, patch testing, and proper drying. By avoiding common mistakes and committing to regular care and mindful storage, your white kitten heels won’t just look good; they’ll retain their structural integrity and radiant appearance for many seasons to come. Step out with confidence, knowing that your elegant white kitten heels are perfectly clean, impeccably maintained, and ready to make a pristine impression. Embrace the beauty of white footwear, because now you have all the tools to keep it dazzling.