Love the Look, Hate the Pain? The 15-Minute Fix for Making Slingback High Heels More Comfortable
Discover how to make your slingback high heels comfortable in just 15 minutes. This guide covers quick fixes, proper fit, materials, and foot care to eliminate pain.
This post may contain affiliate links. If you make a purchase through these links, we may earn a commission at no additional cost to you.
Slingback high heels are undeniably chic. They offer a sophisticated, elegant silhouette that can elevate almost any outfit, from a professional power suit to a glamorous evening gown. With their open back and a strap gracefully circling the ankle or heel, they strike a perfect balance between the structure of a pump and the airiness of a sandal. They often make your legs look longer and create a refined, polished appearance.
However, the love affair with slingbacks often comes with a significant caveat: pain. Many of us have experienced the frustration of a beautiful pair of slingbacks causing blisters, slipping straps, or general discomfort after just a short time. The very design that makes them so appealing – that open back and delicate strap – can also be their biggest downfall for comfort. It’s a common dilemma: how do you enjoy the look without enduring the agony?
This comprehensive guide will show you how to transform your painful slingbacks into wearable wonders. We’ll delve into the common issues, reveal immediate “15-minute fixes” that can offer instant relief, and explore long-term strategies for enduring comfort. You don’t have to sacrifice style for comfort; you can have both.
The Allure and the Agony: Understanding Slingback Heels
Slingback heels have been a fashion staple for decades, continually reinventing themselves while retaining their signature elegance. Their enduring popularity isn’t just about trends; it’s about their unique aesthetic contribution. Yet, this very design also introduces specific challenges for foot comfort.
Why We Love Them: Style, Elegance, and Versatility
The appeal of slingback heels is multifaceted. First, their sleek profile provides a refined look, often featuring a pointed toe that further elongates the leg line. They offer a hint of skin at the heel, which is less restrictive than a closed-back pump, making them feel lighter and more breathable, especially in warmer weather. This open design also makes them incredibly versatile. You can easily transition them from a formal office setting to a cocktail party without missing a beat. They pair well with dresses, skirts, tailored trousers, and even elevated denim, adding a touch of sophistication to any ensemble. They truly are a wardrobe workhorse for many.
The Common Pain Points: Where Comfort Goes Wrong
Despite their visual appeal, slingbacks are notorious for specific comfort issues. Understanding these problems is the first step toward fixing them.
- Slipping Straps: This is arguably the most common complaint. The elasticized or buckled strap, designed to hold your foot in place, frequently slides down the heel. This can be incredibly annoying, making you constantly stop to adjust your shoes, disrupting your stride, and leading to instability. The problem is often compounded by varying heel shapes or if the strap loses its elasticity over time. When the strap slips, your foot isn’t properly secured, and you can end up walking out of the shoe.
- Pressure Points and Rubbing: Because the slingback strap sits directly against the Achilles tendon area, it can create significant friction. This rubbing can lead to painful blisters, chafing, or irritation on the back of your heel. The edge of the shoe’s “vamp” (the upper part that covers the front of the foot) or the toe box can also pinch, especially with pointed-toe styles, leading to pressure on your toes and forefoot.
- Ball-of-Foot Pain (Metatarsalgia): High heels naturally shift your body weight forward, placing immense pressure on the ball of your foot, also known as the metatarsal area. This concentrated pressure can cause burning, aching, or numbness in the forefoot, a condition often referred to as metatarsalgia. The steeper the arch of the heel, the greater this forward pressure becomes.
- Achilles Tendon Irritation: The slingback strap can dig into the Achilles tendon, which is a strong band of tissue connecting your calf muscles to your heel bone. This constant pressure, especially if the strap is too tight or inflexible, can cause soreness, inflammation, or even a condition known as “pump bump” (Haglund’s deformity) in severe, prolonged cases, though this is rare from just slingbacks. More commonly, it’s just general irritation from friction.
- General Instability: When the strap isn’t secure, or the shoe itself doesn’t fit properly, you might experience a feeling of instability. This can make walking awkward, increase the risk of trips or falls, and contribute to overall foot fatigue as your muscles work harder to keep the shoe on.
Addressing these specific pain points requires a targeted approach, often starting with immediate solutions that can make a difference in minutes.
The 15-Minute Fix: Immediate Comfort Solutions
You’ve got a last-minute event, or your new slingbacks are suddenly acting up. You don’t have weeks for a professional stretching service. This section focuses on quick, actionable solutions you can implement in about 15 minutes to dramatically improve the comfort of your slingback high heels. These are your emergency comfort hacks, designed for immediate relief.
The Grip & Stick Method: Securing Your Stride
The most common and frustrating issue with slingbacks is the slipping strap. These simple adhesive solutions work by increasing friction and cushioning between your foot and the shoe.
Heel Grips: Anchoring Your Ankle
What they are: Heel grips, sometimes called heel liners or heel cushions, are adhesive pads designed to stick to the inside back of your shoe, right where your heel sits. They are typically made from soft materials like suede, silicone gel, or foam. Their primary function is to fill any small gaps between your heel and the shoe, preventing slippage and reducing friction.
How they work: When your foot slides inside a slingback, it’s often because there’s a tiny bit too much room, allowing your heel to lift slightly from the insole or the strap to slip down. Heel grips work by reducing this excess space and providing a soft, slightly tacky surface for your heel to grip onto. The material, whether it’s soft suede or a grippy silicone, creates increased friction, which physically anchors your heel in place and stops the strap from migrating down. Some specific designs even feature a slight cup or contour to further cradle the heel.
Materials and Application:
- Suede or Felt: These are soft and provide a comfortable, slightly fuzzy surface that can prevent rubbing and increase grip. They’re good for general slippage and blister prevention.
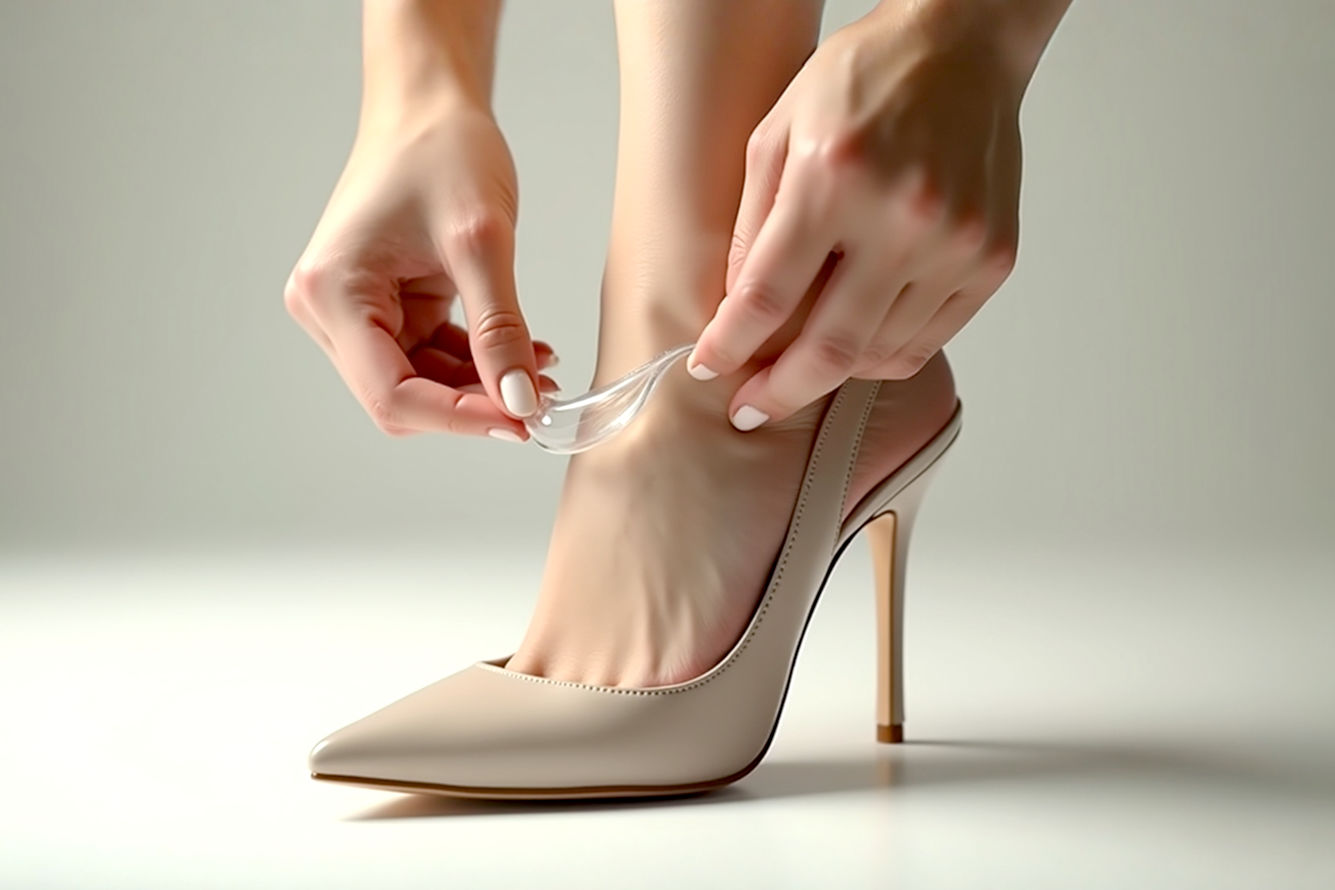
- Silicone Gel: These are often clear and thin, making them discreet. Silicone has a natural tackiness that adheres well to skin, offering excellent grip. They also provide a bit of cushioning.
- Foam: Offers more cushioning than suede or silicone, ideal if the back of your shoe feels hard or creates pressure.
Application Process (The 2-Minute Marvel):
- Clean: Ensure the inside back of your shoe is clean and dry. Any dust or residue will prevent the adhesive from sticking properly.
- Peel & Stick: Remove the protective backing from the heel grip.
- Position: Carefully align the grip inside the heel area of your slingback. Press firmly, especially along the edges, to ensure a secure bond. Make sure it’s positioned where your heel naturally rests and where the strap hits your skin.
- Test: Put on your shoe and walk around. You should immediately feel a more secure fit and less strap slippage. If the strap still slips, you might need to adjust the placement or consider a thicker grip.
Strap Cushions: Cushioning the Delicate Strap
Purpose: Unlike heel grips, strap cushions (or strap liners) are smaller, thinner adhesive pads specifically designed to be applied directly to the inside of the slingback strap itself. Their main purpose is twofold: to provide a soft barrier between the strap and your skin to prevent chafing and blisters, and to add a subtle bit of bulk to the strap, helping it stay up on your heel.
Types and Placement: These are usually made from clear silicone gel or soft, thin fabric-covered foam. For slingbacks, you’ll want narrow, discreet strips.
Application Process (The 2-Minute Solution):
- Clean Strap: Wipe the inside of the slingback strap clean and dry.
- Peel & Stick: Remove the adhesive backing.
- Apply to Strap: Carefully stick the cushion to the underside of the strap, centering it where the strap makes contact with the back of your heel. Ensure it’s smooth and flat to avoid creating new pressure points.
- Test: Wear the shoes. You should notice the strap feels softer against your skin and might be less prone to slipping.
Fashion Tape/Body Tape: A Quick, Temporary Hack
What it is: Fashion tape (also known as toupee tape or body tape) is a double-sided adhesive tape designed for skin and fabric. It’s incredibly thin and typically comes in rolls or pre-cut strips. It’s not a long-term solution but an excellent temporary fix.
How it works: This tape creates an immediate, strong bond between your skin and the shoe strap or between the strap and your hosiery. By temporarily adhering the strap to your heel, it prevents it from slipping down.
Application Process (The 1-Minute Lifesaver):
- Cut (if needed): If using a roll, cut a small, discreet piece of fashion tape, about 1-2 inches long.
- Apply to Skin or Strap: Peel one side of the backing and press the tape firmly onto the back of your heel, where the slingback strap usually rests. Alternatively, you can apply it directly to the inside of the slingback strap itself.
- Secure Strap: Peel off the second backing. Carefully position the slingback strap over the tape, pressing it down firmly onto your skin (or hosiery).
- Instant Hold: The strap should now be securely held in place. This method is fantastic for an evening out or a special event when you need an immediate fix. Remember, it’s a temporary solution and not designed for all-day, everyday wear.
Strategic Padding: Relieving Pressure Points
Beyond strap slippage, slingbacks can cause discomfort in the forefoot and arch. Strategic padding can alleviate this in minutes.
Ball-of-Foot Cushions: Taking Pressure Off Your Toes
What they are: These are gel, foam, or fabric pads designed to be placed directly under the ball of your foot (the metatarsal area) within the shoe. They come in various shapes and thicknesses.
How they work: High heels force your body weight forward, concentrating pressure on the metatarsal bones. Ball-of-foot cushions work by providing extra cushioning and sometimes redistributing this pressure more evenly across the forefoot. By absorbing shock and offering a softer landing for the sensitive area, they significantly reduce burning pain and discomfort. Some designs also include a metatarsal dome, a raised bump that subtly lifts and separates the metatarsal bones, further relieving pressure on nerves and joints.
Application Process (The 2-Minute Relief):
- Clean: Ensure the inside of the shoe’s forefoot area is clean and dry.
- Peel & Stick: Remove the adhesive backing.
- Position: Place the cushion inside the shoe, directly under where the ball of your foot rests. For best results, ensure the thickest part of the cushion is just behind the bony protrusions of your toes, at the widest part of your foot. If it has a metatarsal dome, ensure the dome sits just behind your toes, not directly under them.
- Test: Put on the shoe. You should feel a noticeable difference in cushioning and reduced pressure on your forefoot. Adjust the position slightly if it feels off.
Arch Supports: For Stability and Pain Reduction
What they are: While not always considered a “15-minute fix” in their most robust forms, discreet ¾ length or mini arch support inserts can be quickly placed in slingbacks. They are typically made from firm foam, gel, or even rigid plastic, designed to support the natural curve of your foot’s arch.
How they work: High heels often lack adequate arch support, which can lead to strain on the plantar fascia (the band of tissue connecting your heel to your toes) and general foot fatigue. Arch supports help distribute your body weight more evenly across the entire foot, reducing the strain on your arch and forefoot. They can also improve overall foot stability within the shoe, which indirectly helps with slingback strap retention by preventing your foot from sliding too far forward. For those with fallen arches or flat feet, even a subtle arch support can make a dramatic difference.
Application Process (The 3-Minute Stability Boost):
- Select Size: Choose a ¾ length or a smaller arch support that will fit discreetly in your slingbacks without crowding your toes.
- Position: Place the insert in the shoe, ensuring the arch support aligns with the natural arch of your foot. Most will have an adhesive backing to keep them from shifting.
- Test: Walk around. The shoe should feel more supportive and stable. If the arch support feels uncomfortable or too high, try a different style or a softer material.
By combining one or more of these 15-minute fixes, you can significantly improve the comfort of your slingback high heels, often turning a torturous experience into a much more pleasant one. These are fantastic for immediate relief, but for lasting comfort, a more holistic approach is often needed.
Beyond the Quick Fix: Long-Term Strategies for Slingback Comfort
While quick fixes offer immediate relief, true, lasting comfort with slingback high heels often requires a more thoughtful approach, starting from the moment you choose your shoes. These long-term strategies focus on fit, material, break-in processes, targeted problem-solving, and general foot care.
The Importance of Proper Fit: The Foundation of Comfort
No amount of inserts or hacks can fully compensate for a poorly fitting shoe. Proper fit is the single most critical factor in ensuring comfort.
Measuring Your Feet: When and How
Many people wear the wrong shoe size, often due to changes in foot size over time or incorrect measurements.
- Time of Day: Your feet swell slightly throughout the day due to gravity and activity. Always measure your feet and try on shoes in the late afternoon or evening when they are at their largest. This ensures your shoes will be comfortable even at the end of a long day.
- Both Feet: It’s common for one foot to be slightly larger than the other. Always measure both feet and buy shoes that fit the larger foot.
- Standing Measurement: Measure your feet while standing. This spreads your foot out and gives a more accurate representation of its true size under weight. Use a Brannock Device (found in most shoe stores) or a simple ruler and paper at home. Trace your foot and measure the length from heel to longest toe and the width at the widest part.
Understanding Shoe Anatomy: More Than Just a Number
Beyond length and width, different parts of a slingback affect its fit and comfort.
- Vamp: This is the upper part of the shoe that covers the front of your foot. A higher vamp (one that comes up higher on your foot, closer to your ankle) generally offers more coverage, better grip, and a more secure fit. A lower vamp might be fashionable but provides less support, which can lead to your foot sliding around and increased pressure on your toes.
- Toe Box: This is the area surrounding your toes. With pointed-toe slingbacks, the toe box can be very narrow. Ensure there’s enough room in the toe box for your toes to wiggle comfortably without feeling pinched or crammed. Your longest toe should not touch the very end of the shoe.
- Heel Cup: While slingbacks don’t have a full heel cup like pumps, the base where your heel sits before the strap begins should be stable and supportive. It shouldn’t feel like your heel is sliding off the edges of the sole. If your heel feels like it’s wobbling or hanging off, the shoe might be too narrow for your foot, or the heel itself isn’t well-constructed.
Trying Before Buying: The Walk Test
Never buy slingbacks without trying them on.
- Wear Appropriate Hosiery: Try on shoes with the type of socks or hosiery you plan to wear them with.
- Walk Around: Don’t just stand there. Walk around the store. Pay attention to:
- Strap Tension: Does the slingback strap feel snug but not uncomfortably tight? It should secure your heel without pinching or squeezing. If it’s too loose, it will slip. If it’s too tight, it will dig in.
- Heel Lift: Your heel should not significantly lift out of the shoe with each step. A slight bit of lift is normal for an open-back style, but excessive lifting indicates a poor fit or a strap that’s too loose.
- Pressure Points: Feel for any immediate rubbing or pinching, especially at the back of the heel where the strap sits, or at the toes.
Material Matters: Choosing Comfort from the Start
The materials used in your slingbacks play a huge role in their comfort, breathability, and ability to conform to your foot over time.
Leather vs. Synthetics: Breathability, Stretch, and Break-In
- Genuine Leather: This is often the superior choice for comfort. Leather is a natural material that is breathable, allowing air to circulate and reducing moisture buildup, which can prevent blisters and odor. Crucially, leather has a natural elasticity and will stretch and mold to the unique shape of your foot over time, leading to a custom-like fit. This “breaking in” process can take some time but results in significantly more comfortable shoes. Full-grain leather and patent leather (which has a stiffer, glossy finish) are common. Patent leather can be less breathable and stretch less easily initially, but it can still conform.
- Synthetic Materials (e.g., Faux Leather, PVC): While often more affordable, synthetics typically do not breathe as well as genuine leather, leading to hotter, sweatier feet. More importantly, most synthetic materials do not stretch or mold to your foot in the same way leather does. If a synthetic shoe is uncomfortable from the start, it’s unlikely to get better with wear. There are exceptions with modern engineered synthetics designed for flexibility, but always check the product description for specific features.
Suede and Soft Uppers: Minimizing Friction
- Suede: A type of leather with a napped, fuzzy finish, suede is inherently softer and more pliable than smooth leather. This makes it incredibly comfortable against the skin and less prone to causing immediate rubbing or blisters. It also stretches well.
- Soft Fabrics: Some slingbacks use soft fabrics like satin or velvet. While luxurious, these materials might not offer the same structure or long-term stretch as leather. However, their inherent softness can contribute to initial comfort by reducing friction.
Lining Materials: The Unseen Hero of Comfort
The material lining the inside of your shoe is just as important as the outer material.
- Leather Lining: A full leather lining inside the shoe (not just the outer material) is a hallmark of quality and comfort. It’s smooth, breathable, and allows your foot to glide into the shoe without resistance, reducing friction and blister potential.
- Synthetic Linings: Cheaper shoes often use synthetic linings. These can feel rougher, trap heat and moisture, and be more prone to causing blisters. Always check the lining material.
Breaking Them In: The Gentle Approach to Lasting Comfort
Even well-fitting, high-quality slingbacks need a break-in period. This process allows the materials, especially leather, to soften and conform to your foot’s unique contours. Don’t expect to wear new heels all day right out of the box.
At-Home Methods: Gradually Conforming Your Shoes
- Thick Socks and Hairdryer: This classic method uses heat and gentle pressure to soften materials.
- Put on a pair of thick socks (or two pairs if you need more stretch) that make the shoes feel snug but not painfully tight.
- Put on the slingbacks.
- Use a hairdryer on a medium heat setting, directing it at the tightest areas of the shoe (e.g., the toe box, the slingback strap, or any pressure points) for 20-30 seconds at a time.
- While heating, gently flex your foot and walk around to stretch the material.
- Keep the shoes on with the socks until they cool down completely. This allows the material to cool and set in its stretched position.
- Repeat this process as needed. This method is most effective on genuine leather or suede.
- Wear Them Around the House: The simplest method involves wearing your new slingbacks for short periods around your home. Start with 30 minutes, then gradually increase to an hour, then two. This allows the shoes to naturally mold to your feet through your body heat and movement.
- Shoe Stretching Spray: You can purchase shoe stretching sprays (often alcohol-based) that help relax the fibers of leather or suede, making them more pliable and receptive to stretching. Spray the inside and outside of the tight areas, then wear the shoes or use a stretcher.
Shoe Stretchers: Targeted Expansion
For specific tight spots, a mechanical shoe stretcher can be invaluable. These devices are typically made of wood or plastic and feature adjustable knobs to expand the shoe’s length or width.
- How they work: You insert the stretcher into the shoe and gradually turn the knobs to apply pressure to the areas you want to expand.
- Types: There are stretchers specifically for length, width, or targeted bunion/corn spots.
- Usage: Insert the stretcher, apply a stretching spray if desired, and leave it in for at least 24-48 hours. Gradually increase the tension until the desired comfort is achieved. This method provides a consistent, controlled stretch.
Professional Cobbler Services: When to Call the Experts
If at-home methods aren’t enough, or if you’re dealing with delicate or expensive shoes, a professional cobbler is your best friend.
- Expert Stretching: Cobblers have specialized equipment and knowledge to stretch shoes safely and effectively without damaging the material. They can precisely target problem areas.
- Strap Adjustment: If your slingback strap is consistently too loose or too tight and not improving with other methods, a cobbler can often shorten or lengthen it, or even add a new elastic panel for a custom fit. This is a more permanent and tailored solution than adhesive pads.
- Adding Padding/Modifications: A cobbler can sometimes add custom padding or make internal modifications to improve comfort.
Targeting Specific Pain Points: Specialized Solutions
Beyond general fit, some issues require more focused attention.
Blister Prevention: Protecting Your Skin
Blisters are a common, painful consequence of friction.
- Anti-Blister Balms/Sticks: Apply a waxy, friction-reducing balm directly to your skin in areas prone to rubbing (e.g., the back of your heel, sides of your toes). These create a barrier that allows the skin to glide against the shoe instead of rubbing. Brands like BodyGlide or Compeed Anti-Blister Stick are popular choices.
- Strategic Taping (Athletic Tape or Moleskin): If you know exactly where a blister typically forms, you can preemptively tape the area.
- Moleskin: A soft, cotton flannel with an adhesive backing. Cut a piece slightly larger than the problem area and apply it to your skin before putting on the shoe.
- ENGO Blister Patches: These are specialized, low-friction patches that adhere inside the shoe (not on your skin). They have a PTFE (Teflon-like) surface that significantly reduces friction between your foot and the shoe, allowing your skin to slide freely instead of being subjected to shear forces that cause blisters. This is a highly effective, durable solution for recurring hot spots.
- Gel Heel Protectors: Small, clear gel sleeves or cups that slip over your heel provide a cushion and barrier against strap rubbing.
Achilles Tendon Comfort: Softening the Strap
If the slingback strap irritates your Achilles tendon:
- Softening the Strap: For leather straps, gently bend and flex the strap by hand repeatedly. You can also apply a small amount of leather conditioner to soften it.
- Strap Cushions (as discussed in 15-minute fix): These provide a padded barrier between the strap and your skin, preventing direct rubbing.
- Gel Heel Sleeves: A thin, silicone or fabric sleeve worn over your heel can protect the entire Achilles area from friction.
Slingback Fasciitis and General Heel Pain: When to Consult a Professional
While less common than typical plantar fasciitis, “Slingback Fasciitis” (SBF) is a term coined by some podiatrists to describe heel pain specifically exacerbated by open-back shoes like slingbacks. It’s often related to excessive movement of the heel, especially if the foot overpronates (rolls inward) or has an externally rotated gait.
- Mechanism: Without a rigid heel counter, the heel is less stable and can wander, leading to pressure on the medial (inner) edge of the heel bone against the shoe’s sole. This chronic contusion can inflame the periosteum (the membrane covering the bone) or surrounding tissues.
- Symptoms: Persistent pain on the inner side of the heel, especially when walking or standing, which may be more stubborn than typical plantar fasciitis.
- Solutions: If you suspect SBF or experience persistent, severe heel pain, consult a podiatrist. They can diagnose the issue and recommend:
- Custom Orthotics: Specifically designed insoles that provide targeted arch support and heel stability to control foot motion and redistribute pressure.
- Footwear Modification: They might suggest specific shoe types or modifications (e.g., adding a silicone leveler inside the shoe to reduce edge pressure).
- Rest and Icing: For acute cases, rest and regular icing can reduce inflammation.
- Physical Therapy: Exercises to strengthen foot and calf muscles.
Foot Care Fundamentals: Supporting Your Feet
Even the most comfortable shoes will eventually take their toll if you don’t care for your feet. Proactive foot care is crucial for high heel wearers.
Pre-Wear Prep: Setting the Stage for Comfort
- Moisturize: Keep your feet well-moisturized to maintain skin elasticity and prevent cracks or dry patches that can lead to irritation. Do this daily, not just before wearing heels.
- Foot Powder: If your feet tend to sweat, a light dusting of foot powder (or antiperspirant for feet) can reduce moisture, which in turn reduces friction and blister formation. Apply it before putting on socks or shoes.
Post-Wear Recovery: Soothe and Rejuvenate
After a long day in heels, your feet need some TLC.
- Epsom Salt Soak: A warm foot bath with Epsom salts can help reduce swelling and soothe tired muscles. The magnesium sulfate in Epsom salts is believed to penetrate the skin and aid in muscle relaxation and pain relief.
- Foot Massage: Gently massaging your feet, especially the arches and balls of the feet, can improve circulation, reduce stiffness, and relieve tension. You can use your hands, a foot roller, or even a tennis ball.
- Stretching: Perform simple foot and calf stretches. Point and flex your toes, rotate your ankles, and do calf stretches to release tension in the lower leg and foot. This helps counteract the shortening of calf muscles and tightening of Achilles tendons that can occur with prolonged heel wear.
Rotation of Footwear: Giving Your Feet a Break
Avoid wearing the same high heels, especially slingbacks, day after day. Rotating your footwear allows different muscle groups in your feet and legs to work, preventing overuse injuries and specific pressure points from becoming chronically irritated. It also gives your shoes time to air out and regain their shape. Incorporate flats, supportive sneakers, and shoes with varying heel heights into your wardrobe.
When to Seek Professional Help
While many comfort issues can be resolved with the tips above, some situations warrant professional medical advice. You should consult a podiatrist (a doctor specializing in foot and ankle health) if you experience:
- Persistent or severe pain that doesn’t improve with home remedies.
- Numbness or tingling in your feet or toes.
- Swelling, redness, or warmth that could indicate inflammation or infection.
- Deformities like bunions, hammertoes, or corns that are exacerbated by shoes.
- Chronic slipping or instability despite trying various inserts and sizing adjustments. A podiatrist can accurately diagnose the underlying issue, recommend custom orthotics, prescribe physical therapy, or suggest other medical interventions. Don’t ignore chronic foot pain; it’s your body’s way of telling you something is wrong.
Conclusion
Slingback high heels offer an unparalleled blend of sophistication and style, making them a desirable addition to any fashion-conscious wardrobe. The common perception that comfort must be sacrificed for elegance simply isn’t true. By understanding the specific challenges slingbacks present, implementing immediate “15-minute fixes,” and adopting long-term strategies for fit, material selection, and foot care, you can truly love the look without hating the pain.
From strategically placed heel grips and ball-of-foot cushions that provide instant relief, to the careful selection of leather and professional cobbler adjustments, a world of comfortable slingback wearing is within your reach. Prioritize proper fit, actively break in new shoes, and practice good foot hygiene. Remember, your feet carry you through life; they deserve comfort as much as they deserve style. Step out with confidence, knowing your slingbacks feel as good as they look.