How to Protect and Clean Your Nude Suede Heels to Make Them Last
Nude suede heels are a fashion staple, but their delicate nature demands specific care. Learn how to protect, clean, and maintain your favorite pair for lasting elegance.
This post may contain affiliate links. If you make a purchase through these links, we may earn a commission at no additional cost to you.
Nude suede heels are a fashion staple, offering a touch of elegance and versatility that complements almost any outfit. Their soft, luxurious texture adds sophistication, making them a favorite for both casual and formal occasions. However, the very qualities that make suede so appealing also make it notoriously delicate and prone to damage. Unlike smooth leather, suede’s napped surface, created by sanding the underside of animal hides, readily traps dirt, absorbs liquids, and shows scuffs. This unique structure requires a specific approach to care and protection.
Many people shy away from suede footwear due to its perceived fragility. They might think that keeping nude suede heels looking pristine is an impossible task, leading to premature wear and tear or even discarding beloved pairs. But with the right knowledge, tools, and consistent care, you can significantly extend the life and beauty of your nude suede heels. This comprehensive guide will walk you through everything you need to know, from essential pre-wear protection to advanced cleaning techniques and proper storage, ensuring your favorite heels remain stylish for years to come.
Understanding Suede: The Fabric and Its Vulnerabilities
Before we delve into protection and cleaning, it’s crucial to understand what suede is and why it behaves the way it does. This knowledge forms the foundation of effective care.
What is Suede?
Suede is a type of leather with a fuzzy, napped finish. It’s made from the underside of animal hides, typically lamb, goat, calf, or deer, though pig and cow suede are also common. The characteristic soft, velvety feel is achieved by sanding and buffing the inner surface of the hide, which raises tiny, delicate fibers. This process is called “napping.”
In more technical terms, the tanning process stabilizes the collagen fibers in the hide, preventing decomposition. For suede, the hide is often split, separating the grain (outer) layer from the flesh (inner) layer. The flesh side is then mechanically abraded using specialized sanding machines to create the uniform, raised nap. This mechanical action breaks up the dense fiber structure, creating a softer, more porous material compared to full-grain leather.
Why is Suede So Delicate?
Suede’s delicate nature stems directly from its napped construction. The thousands of tiny fibers that give it its signature softness also create a large surface area, making it highly susceptible to:
- Water Damage: Suede acts like a sponge. When water hits its surface, it’s quickly absorbed into the open fibers. As the water dries, it can pull dirt and dyes to the surface, creating dark, unsightly water spots and often causing the fibers to stiffen and flatten, or “mat.” The chemical interaction of water molecules with the leather’s protein structure can also alter its flexibility and appearance.
- Oil and Grease Stains: Because suede is porous, oil and grease can easily penetrate its fibers. These substances bind to the suede, creating dark, stubborn marks that are difficult to remove without specialized solvents or absorbents. The hydrophobic nature of oils means they resist water-based cleaning, requiring different methods.
- Dirt and Dust Accumulation: The raised nap of suede acts like a magnet for airborne dust and dirt particles. These particles get trapped between the fibers, dulling the shoe’s appearance and making it look worn even when it’s not heavily soiled. Over time, embedded dirt can also abrade the fibers, leading to wear.
- Scuffs and Matting: Any friction or pressure can flatten the delicate nap of suede, leading to shiny, smooth patches or dark marks known as scuffs. These areas lose their characteristic texture and can make the shoe look damaged. Matting occurs when the fibers are pressed down uniformly, often from prolonged pressure or friction.
Understanding these vulnerabilities highlights why proactive protection and precise cleaning methods are not just recommended, but essential, for preserving your nude suede heels.
Essential First Steps: Pre-Wear Protection for New Nude Suede Heels
The most crucial step in maintaining your nude suede heels happens before you even wear them out of the house. Prevention is key when it comes to suede, and a high-quality protector spray is your first line of defense.
Why Protect New Suede?
New suede is a blank canvas, pristine and ready for its first encounter with the outside world. Without proper protection, it’s incredibly vulnerable to everything from unexpected rain showers to spilled drinks and everyday dust. A protective barrier significantly reduces the chances of irreversible damage and makes future cleaning much easier. Think of it as an invisible shield for your shoes.
This pre-treatment creates a hydrophobic (water-repelling) and oleophobic (oil-repelling) layer on the surface of the individual suede fibers. This nanotechnology-driven barrier doesn’t coat the entire surface but rather wraps around each fiber, allowing the suede to retain its breathability and natural feel while resisting the penetration of liquids and oily substances.
Choosing a Suede Protector Spray
Not all protector sprays are created equal. Opt for a spray specifically designed for suede and nubuck. The best options often contain advanced polymers that create a breathable, water-resistant barrier.
- Fluoropolymer-Based Sprays: These are highly effective. Fluoropolymers, like those found in products such as Scotchgard™ or Saphir Super Invulner, create a microscopic, low-surface-energy barrier. This means that water droplets and oil particles form beads and roll off the suede rather than soaking in. The molecules of the fluoropolymer align to present a non-stick surface at a molecular level, preventing absorption. They are generally considered more robust against a wider range of stains.
- Silicone-Based Sprays: These sprays also offer good water resistance by creating a barrier, but they can sometimes alter the texture of suede slightly or attract dirt over time. Silicone forms a more complete, less breathable film on the surface. While effective, some purists prefer fluoropolymer options for their minimal impact on suede’s natural feel and breathability.
Recommendation: For your valuable nude suede heels, investing in a top-tier fluoropolymer-based spray is usually the best choice. Brands like Saphir Médaille d’Or Super Invulner or Collonil Carbon Pro are highly regarded by footwear enthusiasts for their superior performance and minimal impact on suede’s appearance.
The Application Process: A Step-by-Step Guide
Applying protector spray correctly is vital for its effectiveness. Don’t rush this step.
- Preparation is Key:
- Clean the Heels: Even new shoes can have dust from packaging or handling. Gently brush the entire surface of your nude suede heels with a clean, dry suede brush or a soft cloth. Ensure there’s no loose dirt or debris.
- Work in a Well-Ventilated Area: Protector sprays often contain solvents and propellants that can be irritating if inhaled. Work outdoors or in a garage with open windows.
- Protect Your Surroundings: Lay down newspaper or a drop cloth to prevent spray residue from settling on furniture or floors.
- Even Application:
- Hold at the Correct Distance: Hold the spray can approximately 8-12 inches (20-30 cm) away from the shoe. Holding it too close can oversaturate the suede, leading to dark spots or uneven application. Holding it too far away results in insufficient coverage.
- Apply in Light, Even Coats: Spray in short, sweeping motions, covering the entire surface of one shoe. Don’t drench the suede. You want a fine mist that evenly dampens the nap, not saturates it. The goal is to apply a uniform layer that allows for even fiber treatment.
- Cover All Areas: Pay special attention to areas prone to splashes, like the toe, sides, and heel.
- Drying and Reapplication:
- Allow to Dry Completely: Let the first coat dry for at least 30 minutes, or longer if the product instructions recommend. Suede should return to its original color and feel completely dry to the touch. This drying time allows the polymer molecules to properly bond with the suede fibers and form the protective matrix.
- Apply a Second Coat: For maximum protection, especially for lighter-colored nude suede, apply a second light coat. This doubles the protective barrier and enhances resistance.
- Final Drying: After the second coat, allow the heels to dry for several hours, ideally overnight (6-12 hours), before wearing them. This extended drying time ensures the protective layer is fully cured and bonded.
- Initial Brushing:
- Once completely dry, use a clean suede brush to gently brush the nap in one direction. This helps to restore the suede’s natural texture and ensures the fibers aren’t matted down by the spray.
Maintenance Schedule: Reapply the protector spray every 3-6 months, or more frequently if you wear your nude suede heels often or in adverse conditions. Regular reapplication ensures the protective barrier remains effective against daily wear and potential spills.
Daily Care and Preventative Measures
Beyond the initial protection, consistent daily care and smart habits are essential for keeping your nude suede heels looking their best. These simple routines can prevent minor issues from becoming major problems.
Regular Brushing: Your First Line of Defense
A good suede brush is your best friend. Daily or after every few wears, give your heels a quick brush.
- Purpose: Brushing removes loose dirt, dust, and minor scuffs that accumulate from normal wear. It also helps to lift and restore the suede’s nap, preventing it from looking flat or matted.
- Technique: Use short, gentle strokes, always brushing in the same direction initially to remove surface debris. For matted spots or light scuffs, you can try brushing in a back-and-forth motion with slightly more pressure to lift the fibers, but be careful not to over-brush one spot.
- Types of Brushes:
- Brass Bristle Brushes: These are excellent for lifting stubborn dirt and restoring the nap on more resilient suede. The brass bristles are firm enough to agitate the fibers without causing damage, making them highly effective for routine cleaning and light scuff removal.
- Nylon Bristle Brushes: Softer than brass, these are great for delicate suede or for everyday gentle brushing to remove dust. They are less abrasive and good for maintaining the overall appearance.
- Crepe Rubber Brushes: These brushes have a sticky, rubbery surface that effectively pulls dirt and dust particles from the suede’s nap. They are particularly good for polishing and restoring the suede’s texture, acting like a gentle adhesive roller for tiny particles.
Avoiding Moisture and Harsh Conditions
Suede and moisture are natural enemies. While a protector spray offers a barrier, it’s not foolproof.
- Check the Forecast: Before stepping out, especially in your nude suede heels, check the weather. If rain or snow is predicted, opt for different footwear.
- Steer Clear of Wet Surfaces: Avoid puddles, wet grass, and recently mopped floors. Even a light mist can leave marks if the suede isn’t adequately protected or if it’s sustained exposure.
- Be Mindful of Liquids: At events, be extra cautious around drinks. A quick spill can absorb rapidly.
- Avoid Excessive Heat: Never dry wet suede heels with direct heat sources like hair dryers, radiators, or direct sunlight. Rapid drying can cause the suede to shrink, harden, crack, or discolor. Always allow them to air dry naturally.
Using Shoe Trees: Maintaining Shape and Absorbing Moisture
Shoe trees are an investment that pays off, especially for delicate materials like suede.
- Purpose: Shoe trees help maintain the original shape of your heels, preventing creases and wrinkles that can develop from wear. They also absorb moisture from the inside of the shoe, which is crucial for suede that might absorb ambient humidity or foot perspiration. Cedar shoe trees are particularly effective at moisture absorption and odor control due to the porous nature of cedar wood.
- Type: Opt for unvarnished cedar shoe trees. The untreated cedar wood allows for maximum moisture wicking.
- Usage: Insert shoe trees immediately after wearing your heels. This allows them to absorb moisture while the shoes are still warm and pliable, effectively preserving their form as they cool.
Shoe Rotation: Giving Suede a Break
Don’t wear the same pair of nude suede heels every day.
- Purpose: Allowing your shoes to rest for at least 24-48 hours between wears gives the suede time to completely dry out from any absorbed moisture (from perspiration or ambient humidity) and for the fibers to recover their natural spring. This practice extends the lifespan of the material, preventing excessive stress and wear in specific areas.
- Benefits: Rotation prevents excessive flattening of the nap, reduces odor build-up, and allows the shoe’s internal structure to fully recover, contributing to overall longevity.
By incorporating these simple daily and preventative measures into your routine, you’ll dramatically reduce the need for intensive cleaning and ensure your nude suede heels stay elegant and durable for much longer.
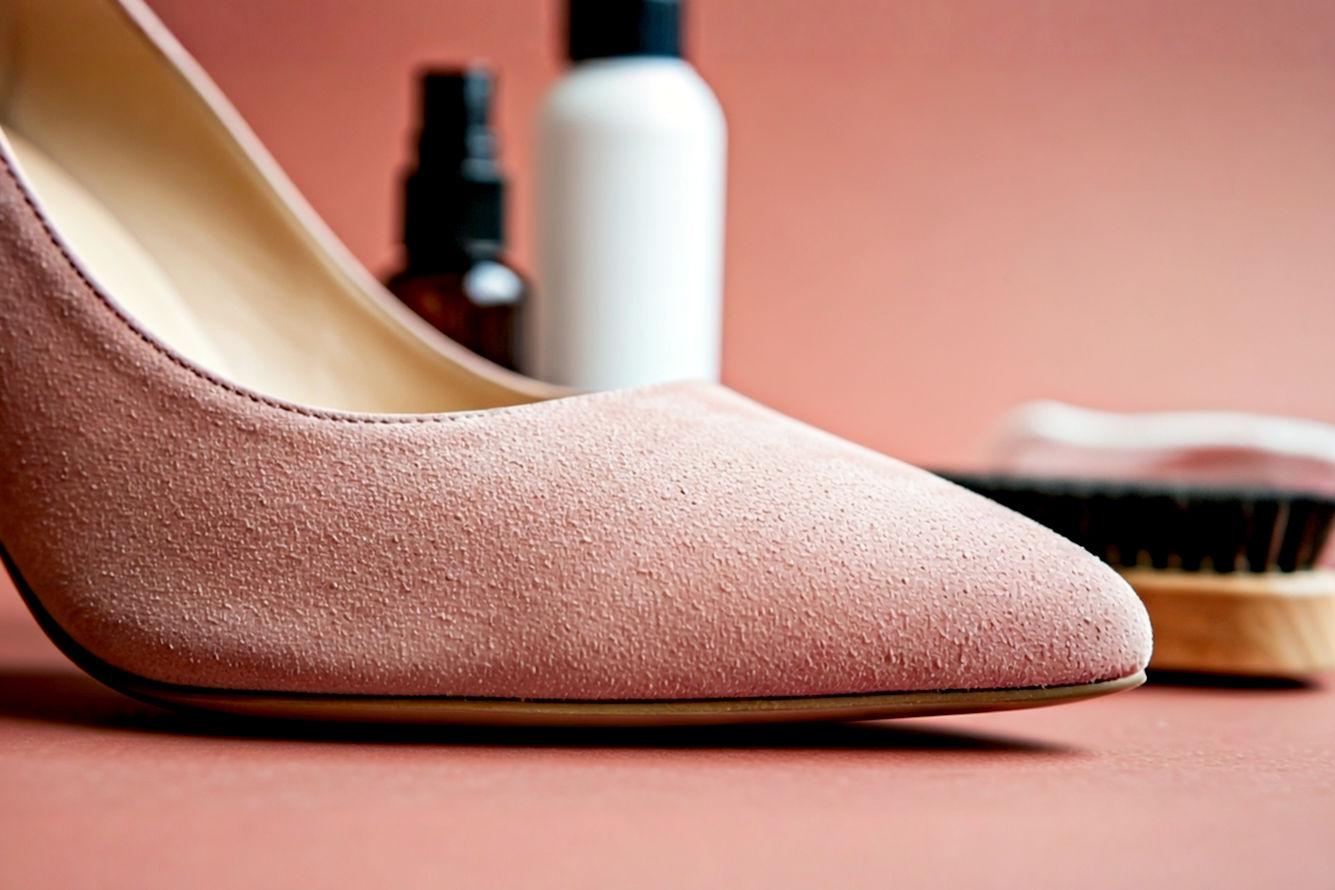
Tools of the Trade: Your Suede Care Arsenal
Effective suede care relies on having the right tools. Building a small but mighty arsenal will equip you for most protection and cleaning tasks.
The Essential Suede Brush
As mentioned, this is your most important tool. Suede brushes are designed specifically to clean and restore the nap without damaging the delicate fibers.
- Brass Bristle Brush:
- Description: Features a head with fine brass wire bristles, often combined with a rubber or nylon edge on the other side.
- Function: The brass bristles are firm enough to dislodge embedded dirt, remove dried mud, and effectively raise matted or flattened nap. The rubber/nylon edge is useful for gentler brushing or more precise cleaning along seams.
- Technical Detail: The brass wires are typically thin and closely spaced, designed to penetrate the suede’s nap and physically agitate the microscopic fibers, allowing trapped particles to be released. They mechanically lift the fibers to restore the original texture and appearance.
- Crepe Rubber Brush:
- Description: Made entirely of natural crepe rubber, often shaped into a block or on a handle. It has a slightly sticky, gummy texture.
- Function: This brush works by gently “grabbing” and pulling dirt, dust, and minor surface stains out of the suede’s nap. It’s excellent for re-texturizing and polishing the suede, making it look vibrant.
- Technical Detail: The unique viscoelastic properties of crepe rubber allow it to deform around and adhere to minute particles and surface fibers. As you brush, the rubber accumulates these particles, effectively cleaning the surface without needing water or chemicals. The friction also helps to re-align the suede fibers, enhancing the uniform appearance of the nap.
- Nylon Bristle Brush (Soft Bristle Shoe Brush):
- Description: Similar to a regular shoe brush but with softer, synthetic bristles.
- Function: Ideal for very delicate suede or for routine, light dusting and maintenance. It’s less aggressive than a brass brush.
- Technical Detail: The synthetic bristles provide a gentler mechanical action, primarily suited for sweeping away loose debris and very lightly lifting the nap without the deeper agitation provided by brass or the adhesive action of crepe.
Tip: For comprehensive care, having both a brass and a crepe brush is ideal. The brass brush tackles tougher jobs, while the crepe brush provides a refined finish and removes finer particles.
The Suede Eraser (Rubber)
This is your go-to for localized spots and scuffs.
- Description: A block of hard rubber or specialized synthetic material, resembling a pencil eraser.
- Function: Suede erasers work by creating friction, which essentially “rubs away” light dirt, scuff marks, and minor stains. They abrade the dirty surface, lifting away the soiled fibers and residue.
- Technical Detail: Unlike a pencil eraser that removes graphite by adhesion, a suede eraser works primarily by mild abrasion. As it’s rubbed, small particles of the eraser material break off, gently scrubbing the dirt or scuff mark from the surface of the suede fibers. This process also helps to lift the compressed nap in scuffed areas.
- Comparison to Pencil Eraser: While a clean pencil eraser can work in a pinch for very minor marks, a dedicated suede eraser is formulated to be more effective and less likely to leave residue or damage the suede. Pencil erasers can contain oils or dyes that transfer to the suede.
Suede Cleaner Solution
For deeper cleaning and more stubborn stains, a specialized cleaner is necessary.
- Description: Typically a liquid solution, often designed to be foamed, that gently cleans suede and nubuck without saturation.
- Function: These cleaners contain mild surfactants (surface-active agents) that break down dirt, oil, and grime, allowing them to be lifted from the suede fibers. They are formulated to be low-moisture and quick-drying to minimize water damage.
- Technical Detail: Surfactants work by reducing the surface tension of water, allowing the cleaning solution to penetrate the hydrophobic suede fibers more effectively. They encapsulate dirt and oil particles, forming micelles that can then be wiped or blotted away. Many also contain conditioning agents to help keep the suede soft.
- Application: Always follow product instructions. Often, you apply a small amount to a clean cloth or brush, work it into a foam, and gently apply it to the stained area, blotting away excess.
Soft Cloths
Keep several clean, lint-free soft cloths (microfiber or cotton) on hand.
- Function: Essential for blotting excess moisture, wiping away cleaner residue, and gently buffing the suede. They are non-abrasive and won’t transfer lint to the delicate nap.
Other Useful Items (Household Remedies)
Sometimes, common household items can be surprisingly effective for specific types of stains, but always test on an inconspicuous area first.
- White Vinegar:
- Function: Mildly acidic, it can help break down certain stains, especially salt or watermarks, by altering their chemical composition and making them easier to lift.
- Technical Detail: The acetic acid in white vinegar can dissolve mineral deposits (like those from hard water) and some organic compounds. Its volatility ensures it evaporates cleanly without leaving residue, provided it’s used sparingly.
- Usage: Dampen a clean cloth with a small amount of white vinegar (do not saturate) and gently blot the stain.
- Rubbing Alcohol (Isopropyl Alcohol):
- Function: Effective for dissolving ink stains and some grease marks due to its solvent properties.
- Technical Detail: As an organic solvent, isopropyl alcohol can dissolve non-polar substances like oils and some inks. Its high volatility means it evaporates quickly, minimizing moisture contact with the suede.
- Usage: Lightly dab a cotton swab or clean cloth with rubbing alcohol onto the stain.
- Cornstarch or Talcum Powder:
- Function: Excellent for absorbing fresh oil or grease stains.
- Technical Detail: These fine powders have a high surface area and porous structure, allowing them to adsorb (stick to the surface of) and absorb (soak up) oily liquids, effectively drawing the grease out of the suede fibers.
- Usage: Sprinkle generously over a fresh oil stain, let it sit for several hours or overnight, then gently brush away.
By having these tools readily available, you’ll be prepared to tackle most suede care challenges, ensuring your nude suede heels maintain their sophisticated appeal.
Cleaning Common Suede Stains: A Step-by-Step Guide
Even with the best protection and daily care, accidents happen. Knowing how to effectively tackle various types of stains is crucial for preserving your nude suede heels. Remember the golden rule: act quickly! The sooner you address a stain, the higher the chance of complete removal. Always test any cleaning method on an inconspicuous area first.
General Dirt and Dust
This is the most common issue and the easiest to resolve.
- Dry Brushing: Ensure the suede is completely dry. Use a suede brush (brass or nylon) to gently brush away any loose dirt or dust. Brush in one direction to lift surface particles, then gently brush against the nap if needed to dislodge stubborn, embedded dirt. The goal is to avoid pushing the dirt deeper into the fibers.
- Focus on Crevices: Pay attention to seams, crevices, and areas where the heel meets the upper, as dirt tends to accumulate there.
Scuff Marks
Scuffs are flattened areas of the nap.
- Suede Eraser: Use a suede eraser to gently rub the scuffed area. Apply light to moderate pressure, rubbing back and forth in short strokes. The eraser’s abrasive action will lift and restore the compressed fibers.
- Brush: After erasing, use your suede brush to gently brush the area, helping to blend the restored nap with the surrounding suede.
Water Stains
Water is suede’s arch-nemesis. Treatment depends on whether the stain is fresh or dry.
- Fresh Water Stains (Damp Suede):
- Blot Immediately: Using a clean, dry, lint-free cloth or paper towel, gently blot the wet area. Do NOT rub, as this can spread the stain or push water deeper.
- Even Dampening (Optional but Recommended for Uniformity): If the stain is localized, you can try to “re-wet” the entire affected panel of the shoe evenly using a fine mist spray bottle filled with clean water. This helps prevent a hard water line as it dries.
- Air Dry: Allow the heels to air dry completely, away from direct heat or sunlight. Stuff them with crumpled newspaper or use shoe trees to maintain their shape.
- Brush: Once bone dry, use a suede brush to restore the nap.
- Dried Water Stains:
- Suede Eraser: Often, a suede eraser can lift minor dried water marks by abrading the stained fibers. Rub gently over the stain.
- White Vinegar (for stubborn marks):
- Preparation: Dampen a clean cloth (or cotton ball) with a small amount of white vinegar. It should be damp, not dripping wet.
- Application: Gently blot and lightly rub the stained area. The vinegar’s mild acidity helps break down water mineral deposits.
- Drying: Allow to air dry completely. The vinegar smell will dissipate as it dries.
- Restore: Once dry, brush the nap vigorously with a suede brush. You may need to repeat this process if the stain persists.
Oil and Grease Stains
These require immediate action and an absorbent.
- Act Fast: As soon as you notice an oil or grease stain, immediately blot away any excess liquid with a clean paper towel. Do not rub.
- Apply Absorbent: Liberally sprinkle the stain with cornstarch, talcum powder, or even baking soda. These powders are highly absorbent.
- Allow to Absorb: Let the powder sit on the stain for several hours, or ideally, overnight. The powder will draw the oil out of the suede fibers. For very deep or old stains, you might let it sit for 24-48 hours. The principle behind this is capillary action and adsorption: the powder’s porous structure provides a massive surface area for oil molecules to bind to and be wicked away from the suede.
- Brush Away: Once the powder has absorbed the oil (it might appear clumpy or discolored), gently brush it away with a dry suede brush. Avoid rubbing the powder into the stain.
- Repeat if Necessary: For persistent stains, you may need to repeat the absorbent application process.
- Suede Cleaner (if stain remains): If a faint mark persists, a specialized suede cleaner (applied sparingly and blotted) might be necessary.
Mud Stains
Resist the urge to clean wet mud!
- Let it Dry Completely: This is critical. Trying to clean wet mud will only spread it and push it deeper into the suede fibers. Allow the mud to dry and harden completely, often overnight.
- Scrape/Brush Away Dry Mud: Once dry, carefully scrape off as much caked-on mud as possible using a blunt knife or the edge of a credit card. Then, use a stiff-bristled suede brush (like brass) to gently brush away the remaining dried mud. Brush in one direction to lift the particles.
- Suede Eraser/Cleaner: For any remaining mud stains or discoloration, use a suede eraser. If that doesn’t work, apply a small amount of suede cleaner with a clean cloth, blotting gently.
- Air Dry and Brush: Allow to air dry, then restore the nap with your suede brush.
Gum or Wax
These sticky substances need to be hardened before removal.
- Freeze It: Place the affected part of the shoe (or the entire shoe if possible) in a freezer. Place it in a plastic bag first to prevent transfer of odors or frost.
- Harden: Allow the gum or wax to freeze and harden completely (usually 30 minutes to an hour). The low temperature causes the polymer chains in the gum/wax to become rigid and brittle, making them easier to break.
- Scrape Off: Once frozen solid, carefully chip or scrape off the hardened substance using a blunt knife or a credit card. Be gentle to avoid damaging the suede nap.
- Brush: Brush away any small residues with a suede brush.
Ink Stains (Challenging)
Ink is one of the toughest stains to remove from suede. Success depends on the type of ink and how fresh the stain is.
- Rubbing Alcohol:
- Test First: Always test rubbing alcohol on an inconspicuous area, as it can sometimes lighten certain dyes.
- Dab, Don’t Rub: Lightly dampen a cotton swab or the corner of a clean cloth with rubbing alcohol. Gently dab the ink stain. Do NOT rub, as this can spread the ink. The alcohol acts as a solvent, dissolving the ink.
- Blot: Immediately blot the area with a clean, dry cloth to absorb the dissolved ink.
- Repeat: Repeat the dabbing and blotting process, using a clean part of the swab/cloth each time, until the stain fades or is gone.
- Air Dry and Brush: Allow to air dry, then brush the nap.
- Sandpaper (Fine-Grit, Extreme Last Resort): For very old, set-in ink stains, some experts suggest very carefully using fine-grit sandpaper (like 400-600 grit) to lightly abrade the very top layer of the suede fibers. This is a highly risky maneuver and should only be done if all other methods fail and you’re willing to risk damaging the suede. It permanently removes a layer of the nap.
- Professional Help: For valuable or severely ink-stained nude suede heels, professional cleaning is highly recommended.
Blood Stains
Blood contains proteins that can bind to fibers.
- Cold Water & Salt (Fresh Blood): For fresh blood, immediately blot with a clean cloth dampened with cold water. Avoid hot water, which can set the protein. A paste of cold water and salt can also be applied to fresh stains, allowed to dry, then brushed off. The salt helps draw out moisture and some blood components.
- Hydrogen Peroxide (Dried Blood):
- Test First: Test on an inconspicuous area, as hydrogen peroxide is a mild bleaching agent.
- Dab: Dampen a cotton ball with a small amount of hydrogen peroxide. Gently dab the dried blood stain.
- Blot: Blot with a clean, dry cloth.
- Repeat: Repeat until the stain is gone.
- Air Dry and Brush: Allow to air dry, then brush the nap.
Patience and a gentle hand are crucial when cleaning any suede stain. Aggressive scrubbing can damage the nap and make the stain worse.
Deep Cleaning Your Nude Suede Heels
Sometimes, regular brushing and spot treatments aren’t enough. When your nude suede heels start to look uniformly dingy, or if they’ve accumulated a significant amount of embedded dirt despite your best efforts, it’s time for a deeper clean.
When to Deep Clean
You should consider deep cleaning your nude suede heels when:
- Overall Dullness: The vibrant nude color appears muted, or the entire shoe looks generally dirty rather than just having localized stains.
- Embedded Dirt: Brushing no longer lifts visible dirt, indicating particles are deeply lodged within the nap.
- Loss of Texture: The suede feels coarse or stiff, and the nap is consistently flattened or matted across large areas.
- Unpleasant Odors: While less common for the exterior, persistent odors might indicate embedded grime requiring a thorough clean.
The frequency of deep cleaning depends on how often you wear your heels and the conditions they’re exposed to. For occasional wear, once a year might suffice, but for more frequent use, every six months could be beneficial.
Using Specialized Suede Cleaners
For a deep clean, a commercial suede cleaner is usually the most effective and safest option. These products are specifically formulated to clean suede without causing excessive saturation or damage.
- Preparation:
- Remove Laces (if applicable) and Stuff Shoes: If your heels have any embellishments or a delicate lining, remove them or protect them. Stuff the toes and body of the heels with crumpled newspaper or use shoe trees. This helps the shoes maintain their shape during cleaning and absorbs excess moisture from within.
- Remove Surface Dirt: Before applying any cleaner, thoroughly brush the entire surface of your heels with a suede brush (a brass one is excellent here) to remove as much loose dirt and debris as possible. This prevents you from rubbing dirt deeper into the suede during the wet cleaning process.
- Work in a Well-Ventilated Area: Ensure good airflow, as cleaning solutions may contain solvents.
- Application Techniques (Foaming Cleaners are Common):
- Many suede cleaners are designed to foam up, which is ideal because it minimizes the amount of liquid that comes into direct contact with the suede fibers. This reduces the risk of watermarks and saturation.
- Dispense Cleaner: Apply a small amount of the suede cleaner directly to a clean, damp cloth or to a specialized applicator brush (often supplied with the cleaner).
- Create Foam: Work the cleaner into a rich foam. The foam particles carry the active cleaning agents, allowing them to penetrate and lift dirt without over-wetting the suede.
- Gentle Application: Starting from one section, gently apply the foam to the suede in small, circular motions or light, back-and-forth strokes. Work in small sections, avoiding excessive rubbing. The goal is to lift the dirt, not scrub it in.
- Avoid Saturation: Crucially, do not saturate the suede. The surface should be damp with foam, not soaking wet.
- Wipe Away Residue: Immediately after working a section, use a clean, dry cloth to gently wipe away any excess foam and lifted dirt. Rinse the cloth frequently or use multiple cloths to avoid spreading dirt.
- Uniformity: Work across the entire surface of both heels evenly. Cleaning just one spot or one shoe can lead to noticeable color or texture differences once dry.
- Rinsing (Minimal Water):
- Some cleaners require a very light “rinse” or wiping with a slightly damp, clean cloth. If so, ensure the cloth is only barely damp. The idea is to remove cleaner residue, not to re-wet the suede. Many modern suede cleaners are designed to be wiped clean without needing a separate rinse step.
- Blotting: After cleaning, use a dry, absorbent towel to blot the entire surface of the heels, pressing gently to absorb as much moisture as possible.
Drying and Restoring the Nap
Proper drying is as important as the cleaning itself. Rushing this stage or using incorrect methods can undo all your hard work and permanently damage your nude suede heels.
Proper Drying Techniques
- Air Dry ONLY: Always allow your suede heels to air dry naturally. This is the golden rule. Direct heat (from radiators, hair dryers, or direct sunlight) can cause the suede to stiffen, crack, shrink, or discolor. The rapid evaporation of water under high heat can also leave behind more pronounced watermarks due to the uneven distribution of dissolved minerals from the water.
- Maintain Shape: Stuff the toes of your heels with crumpled newspaper or paper towels. This helps absorb internal moisture and, more importantly, maintains the shoe’s original shape as it dries, preventing creases and warping. Do not use colored newspaper as the ink can transfer.
- Optimal Environment: Place the heels in a cool, dry, well-ventilated area. Avoid damp basements or confined spaces, which can promote mold or mildew growth.
- Patience is Key: Drying can take several hours, often overnight, or even up to 24 hours depending on humidity and how damp the suede got. Ensure they are completely, bone dry before proceeding to the next step. Even a slight dampness can cause issues.
Restoring the Nap
Once your nude suede heels are thoroughly dry, the nap might appear stiff, matted, or slightly discolored. This is normal, and restoring the nap is a critical step in bringing back their luxurious feel and appearance.
- Vigorous Brushing: Using a dry suede brush (a brass bristle brush is particularly effective here), vigorously brush the entire surface of the heels.
- Technique: Use firm, back-and-forth strokes, or short, circular motions, applying enough pressure to lift the matted fibers. You should see the suede’s characteristic velvety texture reappear. The goal is to re-align the individual fibers that were compressed and flattened during the wet cleaning and drying process.
- Direction: Brush against the grain in some areas to fully lift the nap, then smooth it out by brushing in a consistent direction for a uniform look. This mechanical agitation restores the light-reflecting properties of the nap, making the suede look more vibrant.
- Suede Renovator Sprays (for Color and Texture):
- Purpose: If your nude suede heels have lost some of their original color vibrancy or feel a bit stiff after cleaning, a suede renovator spray can work wonders. These sprays typically contain conditioning agents (like natural oils such as almond oil) and sometimes a light pigment to refresh the color. They nourish the suede, restoring its softness and elasticity.
- Application: After the heels are completely dry and brushed, shake the renovator spray well. Hold it about 8-10 inches (20-25 cm) away and apply a light, even mist over the entire surface.
- Drying: Allow to dry for about 10-15 minutes.
- Final Brush: Give them a final, gentle brush to distribute the product evenly and fluff up the nap one last time.
The combination of proper drying and thorough nap restoration will bring your nude suede heels back to life, looking refreshed and ready for wear.
Long-Term Storage for Suede Heels
Proper storage is often an overlooked aspect of footwear care, but it’s particularly important for delicate materials like suede. Storing your nude suede heels correctly protects them from dust, light, and humidity, ensuring they remain in pristine condition between wears.
Cleaning Before Storage
Never store dirty or stained shoes. Even small amounts of dirt or residue can become deeply embedded or attract pests over time.
- Thorough Cleaning: Before putting your heels away for an extended period, perform a comprehensive cleaning. Follow the steps outlined earlier: remove all surface dirt with a brush, address any existing stains (water, oil, etc.), and if necessary, perform a deep clean with a suede cleaner.
- Ensure Complete Dryness: This is paramount. Any residual moisture can lead to mold, mildew, or unpleasant odors, which are very difficult to remove from suede. Allow the heels to air dry completely for at least 24-48 hours after cleaning, even if they feel dry to the touch. The internal structure and all fibers must be free of moisture.
Stuffing and Shaping
Maintaining the shoe’s structural integrity during storage is key to preventing creasing and distortion.
- Use Shoe Trees: Ideally, insert unvarnished cedar shoe trees into your suede heels. Cedar absorbs moisture and odors while maintaining the shoe’s shape.
- Crumpled Acid-Free Tissue Paper: If you don’t have shoe trees, stuff the toes and body of the heels with crumpled acid-free tissue paper. This provides support and helps absorb any lingering moisture. Avoid using newspaper directly, as the ink can transfer to the nude suede over time, especially in humid conditions. Acid-free tissue paper is chemically stable and won’t degrade or yellow the material.
- Heel Supports: For high heels, consider using small heel supports or rolls of tissue paper under the arch to prevent undue pressure on the heel shaft, which can cause bending or weakening.
Optimal Storage Environment
The environment where you store your suede heels significantly impacts their longevity.
- Dark and Dry:
- Darkness: Store heels in a dark place, away from direct sunlight or strong artificial light. Prolonged exposure to light, especially UV rays, can cause the nude suede color to fade unevenly or the material to dry out and become brittle.
- Dryness: Choose a dry area with stable humidity levels. High humidity can lead to mold and mildew growth, while extremely low humidity can dry out the suede, making it stiff and prone to cracking. A consistent temperature is also beneficial.
- Breathable Storage Bags or Boxes:
- Cotton or Fabric Bags: Store your heels in breathable cotton or fabric shoe bags. These bags protect the shoes from dust and scuffs while allowing air circulation, which prevents moisture build-up. Many quality heels come with such bags.
- Original Shoe Boxes: If you keep the original shoe boxes, they can be good for storage, provided they are clean and sturdy. Add a silica gel packet to the box to absorb excess moisture, especially if you live in a humid climate. Ensure the boxes aren’t airtight, as some airflow is necessary.
- Avoid Plastic Bags: Never store suede in sealed plastic bags or airtight containers. This traps moisture and prevents air circulation, creating an ideal environment for mold and mildew to thrive, leading to irreparable damage and foul odors. Suede needs to “breathe.”
- Avoid Crowding: Give each pair of heels enough space. Crowding shoes together in a closet can lead to scuffs, pressure marks, and flattened nap. Use shoe racks, cubbies, or individual boxes to keep them separate and supported.
By meticulously cleaning, shaping, and storing your nude suede heels in an optimal environment, you ensure they remain beautiful and ready for countless wears, preserving their elegant appeal for years to come.
Common Suede Care Mistakes to Avoid
Even with the best intentions, certain common errors can inadvertently damage your nude suede heels. Knowing these pitfalls can save you from costly mistakes and extend the life of your cherished footwear.
Using Water Incorrectly
This is perhaps the most frequent and damaging mistake.
- Soaking: Never soak suede heels in water or attempt to wash them under a running tap. Suede is highly absorbent, and excessive water will cause it to stiffen, change color, and often result in irremovable watermarks as it dries. The collagen fibers can swell and then contract unevenly upon drying, leading to irreversible textural changes.
- Rubbing Wet Stains: If suede gets wet, resist the urge to rub it. Rubbing will only push water and any accompanying dirt deeper into the fibers, making the stain larger and more difficult to remove.
- Using Too Much Liquid Cleaner: Even with specialized suede cleaners, over-applying the product can lead to saturation. Always use the minimal amount necessary and work in small sections.
Harsh Scrubbing
Aggressive cleaning can do more harm than good.
- Damaging the Nap: Suede’s nap is delicate. Scrubbing too hard, especially with abrasive brushes or cloths, can permanently damage the fibers, leading to bald spots, thinning, or a rough texture. It can also push dirt further into the material rather than lifting it.
- Color Fading: Excessive friction can sometimes cause the dye in suede to lighten or fade in the scrubbed area, creating an uneven appearance.
Using Inappropriate Products
Not all cleaners are suitable for suede.
- Regular Leather Cleaners/Polishes: Products designed for smooth leather contain oils, waxes, and chemicals that can stain, grease, or permanently alter the texture of suede. They will clog the nap and make it stiff.
- Household Cleaners (without testing): While some household items like vinegar or rubbing alcohol can be effective for specific stains, using harsh detergents, bleach, or general household cleaners not explicitly recommended for suede can cause irreversible damage, discoloration, or chemical reactions. Always test on an inconspicuous area first.
- Colored Wipes/Cloths: Using colored cloths or wipes can transfer dyes to your nude suede, creating new stains. Always use clean, white, lint-free cloths.
Ignoring Stains
Delaying treatment makes stain removal much harder.
- Setting In: Allowing dirt, oil, or liquid stains to sit on suede for too long gives them time to deeply penetrate and bond with the fibers. Once a stain sets, it becomes significantly more challenging, if not impossible, to remove completely without professional intervention. Chemical reactions might also occur over time, making removal harder.
- Permanent Damage: Certain substances, especially those with strong dyes or acidic/alkaline properties, can cause permanent discoloration or fiber damage if left untreated.
Improper Drying
Rushing the drying process or using heat.
- Direct Heat: As previously mentioned, drying suede with direct heat (hair dryer, radiator, sunlight) can cause irreversible shrinking, hardening, cracking, and severe discoloration. The rapid loss of moisture stresses the leather’s protein structure.
- Drying Flat: Laying wet suede heels flat can lead to warping or loss of shape. Always stuff them with paper or use shoe trees and allow them to air dry in their natural form.
By being mindful of these common mistakes and adopting cautious, consistent care practices, you can significantly prolong the life and maintain the pristine appearance of your elegant nude suede heels.
When to Seek Professional Suede Cleaning
While diligent home care can address most issues, there are times when entrusting your nude suede heels to a professional cleaner is the wisest choice. Recognizing these situations can prevent you from causing further damage to valuable footwear.
Severe Damage
If your heels have suffered extensive or complex damage, professional help is invaluable.
- Deep-Seated Stains: For stains that are old, large, or have deeply penetrated the suede fibers (like large oil spills, red wine, or significant ink marks) that you haven’t been able to remove with home methods. Professionals have access to industrial-strength solvents and specialized cleaning processes that are more effective without damaging the suede. These may include solvent-based degreasers or specific chelating agents that can break down complex molecular bonds in the stain without requiring excessive moisture.
- Extensive Discoloration: If your nude suede heels have widespread discoloration, fading, or severe watermarks across large areas, a professional can often restore the color and even out the tone using specialized dyes and conditioners. They can match the original nude shade far better than over-the-counter products.
- Structural Damage: Tears, rips, or significant scuffs that have gone beyond mere nap flattening might require professional repair, including patching, re-napping, or re-dying techniques. They can also address issues with the heel itself, like wobbliness or tip replacement.
Intractable Stains
Some stains are simply too challenging for DIY methods.
- Unknown Origin Stains: If you don’t know what caused a stain, it’s safer to let a professional identify it and choose the appropriate treatment. Using the wrong cleaning agent can set the stain permanently or create new damage.
- Delicate or Exotic Suede: If your nude heels are made from exceptionally delicate suede (e.g., kidskin or very thin suede) or an exotic leather that has a suede finish, their care might require specialized knowledge to avoid irreparable harm. Professionals are trained to assess the specific type of material and its unique vulnerabilities.
Delicate or Expensive Heels
For high-value or sentimental items, the risk of DIY damage often outweighs the cost of professional cleaning.
- Designer Footwear: If your nude suede heels are a designer pair or a significant investment, the cost of professional cleaning is a small price to pay to ensure their longevity and maintain their value. Professionals are insured and experienced with handling luxury items.
- Sentimental Value: Heels with sentimental significance should also be handled with extra care. A professional can often restore them to a wearable condition even if they appear heavily damaged, allowing you to cherish them for longer.
Professional Expertise and Equipment
Professional cleaners possess knowledge, tools, and techniques not available to the average consumer.
- Specialized Equipment: They use industrial-grade cleaning machines, gentle steaming processes, and vacuum systems that can effectively clean suede without saturation.
- Expert Knowledge: Professionals understand the different types of suede, their specific chemical compositions, and how various cleaning agents interact with them. They can identify the exact type of stain and apply the most effective, least invasive treatment.
- Re-conditioning and Protection: After cleaning, professionals often re-condition and re-protect the suede, leaving it soft, supple, and better prepared to resist future damage. This may involve specialized emollients and water-repellents that offer superior performance.
While professional cleaning comes at a cost, it can often save a pair of heels that would otherwise be considered beyond repair. For those challenging situations, it’s an investment in your footwear’s continued beauty and lifespan.
Conclusion
Nude suede heels are a timeless and elegant addition to any wardrobe, capable of elevating your style with their unique texture and versatile color. However, their beauty comes with a responsibility: they demand dedicated care and attention. As we’ve explored, suede’s napped surface, while luxurious, makes it highly vulnerable to common enemies like water, oil, dirt, and scuffs. Ignoring these vulnerabilities can quickly lead to irreversible damage, fading the allure of your favorite pair.
The journey to preserving your nude suede heels begins with proactive protection. Applying a high-quality fluoropolymer-based protector spray before the first wear creates an invisible shield, dramatically reducing absorption and making future cleaning much simpler. This initial step is your most powerful defense against everyday wear and unexpected spills. Complementing this, consistent daily care — including regular brushing, strategic shoe rotation, and the wise use of shoe trees — keeps the nap lifted, removes surface dust, and maintains the shoes’ structural integrity.
When stains do occur, swift and precise action is paramount. Arming yourself with the right tools – a versatile suede brush (brass and crepe are ideal), a reliable suede eraser, and a gentle suede cleaner – empowers you to tackle common culprits like watermarks, oil spots, and scuffs effectively. Remember to always work gently, avoid saturation, and allow ample time for natural air drying. The process of restoring the nap after cleaning is equally crucial, bringing back the suede’s signature velvety feel and vibrant appearance.
Finally, proper long-term storage in a dark, dry, and breathable environment safeguards your heels from environmental damage, ensuring they are pristine and ready for every occasion. And for those moments when stains are too stubborn or damage too extensive, don’t hesitate to seek professional cleaning. A specialist has the expertise and equipment to rescue and rejuvenate even the most challenging cases, protecting your investment.
By embracing these comprehensive protection and cleaning strategies, you’re not just maintaining your nude suede heels; you’re investing in their longevity and ensuring they remain a cherished, elegant component of your style for many years to come. With a little consistent effort, your beautiful nude suede heels will continue to make a stunning statement with every step you take.