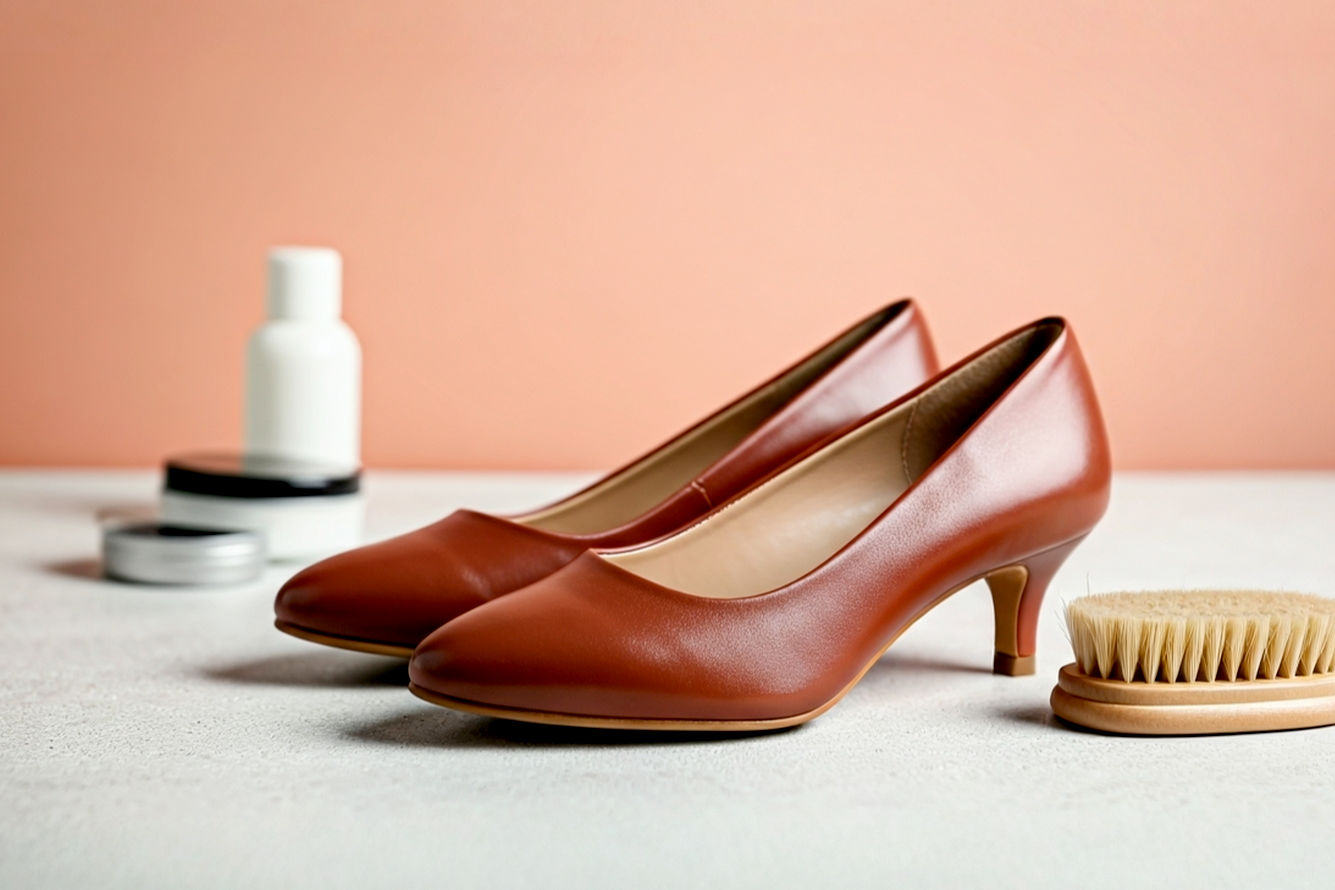
How to Care for Your Leather Kitten Heels to Make Them Last a Lifetime
Unlock the secrets to making your leather kitten heels last a lifetime. This definitive guide covers everything from choosing the right care products to mastering cleaning, conditioning, polishing, and smart storage techniques. Preserve their elegance for years to come.
This post may contain affiliate links. If you make a purchase through these links, we may earn a commission at no additional cost to you.
Leather kitten heels are more than just shoes; they’re an investment in elegance and style. Their delicate height and sophisticated silhouette make them a versatile choice, perfect for everything from a busy workday to a glamorous evening out. But to ensure these beautiful shoes remain a staple in your wardrobe for years—even a lifetime—they need consistent, thoughtful care. Think of it as a small effort today that pays off with lasting beauty and durability.
This comprehensive guide will walk you through every essential step of caring for your leather kitten heels. We’ll cover everything from understanding the type of leather your shoes are made from to mastering daily maintenance, deep cleaning, conditioning, and polishing. You’ll also learn how to tackle common issues like scuffs and water damage, and the best ways to store your heels to maintain their shape and integrity. By following these proven techniques, you won’t just be preserving your footwear; you’ll be making sure your beloved kitten heels continue to look as stunning as the day you first wore them.
Understanding Your Leather Kitten Heels: The Foundation of Care
Before you can properly care for your leather kitten heels, you really need to understand what they’re made of and how they’re put together. This knowledge isn’t just for shoemakers; it helps you pick the right cleaning products and care methods. Different leathers react differently, and knowing the parts of your shoe helps you spot wear and tear early.
Types of Leather Used in Kitten Heels
Not all leather is created equal, especially when it comes to footwear. The type of leather significantly impacts its durability, appearance, and the specific care it needs.
Full-Grain Leather: The Gold Standard
Full-grain leather is considered the highest quality leather available, and it’s often used in premium kitten heels. It comes from the top layer of the hide and hasn’t been sanded, buffed, or snuffed to remove imperfections. This means it retains the natural grain, including any unique markings like scars or wrinkles.
The term “full-grain” refers to the entire grain structure remaining intact. This makes it incredibly strong and durable because the strongest fibers of the hide are at the surface. Over time, full-grain leather develops a rich, unique patina—a soft sheen that develops from age and use—which only adds to its beauty. Caring for full-grain leather involves regular cleaning, conditioning to keep its natural oils supple, and protection from excessive moisture. Its natural breathability also contributes to foot comfort.
Top-Grain Leather: Common and Versatile
Top-grain leather is the second-highest grade. It’s similar to full-grain but has had the very top layer, including some imperfections, lightly sanded or buffed off. After this, it’s typically pigmented and finished to give it a more uniform look. While still durable, this processing makes it slightly less breathable and resilient than full-grain leather.
You’ll find top-grain leather very commonly in high-quality shoes because it’s easier to work with and offers a consistent appearance. Its care is similar to full-grain, but it might require less aggressive cleaning and more attention to maintaining the finish.
Suede and Nubuck: The Napped Finishes
Suede and nubuck are both distinguished by their soft, velvety, napped surface, but they’re made differently. Suede is created from the underside of the hide, or by splitting the hide and sanding the inner surface. Nubuck, on the other hand, is made by sanding the outer surface of full-grain leather. This makes nubuck generally more durable than suede, but both are quite delicate compared to smooth leathers.
Because of their fuzzy texture, suede and nubuck require specialized care. They’re highly susceptible to water stains and dirt becoming embedded in the nap. You can’t use traditional leather conditioners or polishes on them; instead, they need special brushes, erasers, and spray protectants designed specifically for napped leathers.
Patent Leather: The High-Gloss Finish
Patent leather is easily recognizable by its incredibly high-gloss, almost mirror-like finish. This isn’t a natural characteristic of the leather itself; it’s achieved by applying a plastic or resin coating to the leather surface. This coating makes patent leather very resistant to water and easy to wipe clean.
However, its glossy surface is prone to showing fingerprints, smudges, and even minor scuffs very clearly. It also isn’t breathable like other leathers. Caring for patent leather involves simple wiping with a damp cloth, avoiding harsh chemicals that can dull or crack the finish, and special attention to preventing scuffs.
Exotic Leathers: Specialized Care
Some high-end kitten heels might feature exotic leathers like alligator, snake, or stingray. These materials often have unique textures and patterns. While this guide focuses on more common leathers, it’s important to remember that exotic leathers typically require highly specialized cleaning products and care techniques, often best handled by a professional cobbler or leather expert.
Anatomy of a Kitten Heel
Understanding the different parts of your kitten heel isn’t just academic; it helps you target your care efforts effectively. Each component plays a role in the shoe’s overall structure and appearance, and each can be a point of vulnerability if not properly maintained.
- Upper: This is the main part of the shoe that covers the top of your foot. It’s usually made from the primary leather type (full-grain, top-grain, suede, patent, etc.) and is the most visible component. This is where most of your cleaning, conditioning, and polishing efforts will be focused.
- Lining: Inside the upper, the lining is the material that directly touches your foot. It’s often made of softer leather, fabric, or synthetic material. While not directly exposed to the elements, a clean and healthy lining contributes to comfort and prevents odor.
- Insole: This is the padded layer inside the shoe, under your foot. A comfortable insole is key for prolonged wear. It can absorb moisture from your foot, so allowing it to dry properly is important.
- Outsole: The very bottom layer of the shoe, the outsole, is the part that makes direct contact with the ground. It’s typically made of leather, rubber, or a synthetic compound. The outsole experiences the most wear and tear and often requires protection or timely replacement to extend the shoe’s life.
- Heel Block: This is the main structure of the heel itself, extending from the outsole to the heel cap. In kitten heels, it’s slender but needs to be sturdy. Damage to the heel block usually requires professional repair.
- Heel Cap (or Heel Tip): This small, replaceable piece is at the very bottom of the heel block. It’s designed to protect the heel block from wear and provide traction. The heel cap is a critical wear point and often the first part of the shoe to need replacement. Neglecting a worn heel cap can lead to irreversible damage to the heel block.
By knowing these components, you can apply targeted care—for instance, protecting the outsole, regularly cleaning the upper, and keeping a close eye on the heel cap for signs of wear.
Prevention is Key: Protecting Your Investment from Day One
You know what they say: an ounce of prevention is worth a pound of cure. This couldn’t be truer for leather kitten heels. Protecting your shoes from day one is the most effective strategy for making them last a lifetime. It involves creating a shield against external elements and reinforcing their natural durability.
Initial Protection: The First Line of Defense
When you first get a new pair of leather kitten heels, the very first thing you should do is protect them. Think of it like applying sunscreen before going out in the sun. This initial treatment creates a barrier that helps repel water, resist stains, and generally make your shoes easier to clean in the long run.
Water and Stain Repellents: Your Invisible Shield
Applying a high-quality water and stain repellent spray is crucial. These sprays work by creating a hydrophobic (water-repelling) layer on the surface of the leather. When water or other liquids hit this treated surface, they bead up and roll off, rather than soaking into the leather fibers. This prevents water spots, salt stains, and liquid spills from permanently marking your shoes.
There are generally two main types of protectant sprays:
- Silicone-based sprays: These create a durable, water-resistant barrier. They are generally effective but can sometimes affect the leather’s breathability or slightly alter its appearance, especially on very delicate or light-colored leathers. Always do a patch test in an inconspicuous area first. The way they work involves depositing a fine layer of silicone polymers that physically repel water molecules.
- Polymer-based (fluoropolymer) sprays: Often considered a more advanced option, these sprays create a breathable, invisible barrier. They don’t typically affect the leather’s natural feel or breathability as much as some silicone products. Fluoropolymers work at a molecular level, forming a complex network that lowers the surface tension of the leather, making it harder for liquids to adhere and penetrate.
Application Best Practices:
- Clean first: Ensure your shoes are completely clean and dry before applying any protectant. Even new shoes can have dust from the factory.
- Ventilate: Use the spray in a well-ventilated area, preferably outdoors.
- Even coat: Hold the can about 6-8 inches away and apply a light, even coat. Don’t saturate the leather. Too much spray can clog the pores and reduce breathability.
- Dry thoroughly: Allow the shoes to dry completely (usually a few hours or overnight) before wearing them.
- Reapply regularly: This protective layer isn’t permanent. Depending on how often you wear your shoes and the conditions they face, reapply the spray every few weeks to every every few months. You’ll know it’s time when water no longer beads up on the surface.
For suede and nubuck, always use a protectant specifically designed for napped leathers, as general leather sprays can alter their texture and color. These specialized sprays maintain the unique feel of suede and nubuck while providing essential protection.
Sole Protectors and Taps
The soles and heel tips of your kitten heels bear the brunt of every step. Protecting these areas is just as important as protecting the leather upper.
Adding Thin Rubber Sole Guards
Leather soles, while elegant, can wear down quickly, especially on hard surfaces. Adding thin rubber sole guards (also known as sole protectors or half-soles) can significantly extend the life of your shoes. Brands like Topy or Vibram offer high-quality, durable rubber sheets that a cobbler can professionally attach to the front half of your leather soles.
Benefits of Sole Guards:
- Extended sole life: They act as a sacrificial layer, protecting the original leather sole from abrasion and wear. This means your expensive original sole lasts much longer.
- Improved grip: Leather soles can be slippery, especially when new or on wet surfaces. Rubber sole guards provide much better traction, reducing the risk of slips and falls.
- Cushioning and comfort: The added thin layer of rubber can provide a slight amount of extra cushioning, making your shoes more comfortable for prolonged wear.
- Water resistance: They add an extra barrier against moisture penetrating through the sole, helping to keep your feet dry in damp conditions.
When to Apply: Ideally, you should have sole guards applied before your first wear, or very soon after, to protect the original sole from any initial damage. A professional cobbler can do this quickly and discreetly, often using a colored rubber that blends seamlessly with the original sole.
Heel Taps/Caps: Crucial for Heel Integrity
The heel tap, or heel cap, is the small piece of material at the very bottom of your kitten heel. It’s typically made of plastic, rubber, or sometimes metal (for added durability). This tiny component is incredibly important because it takes the majority of the impact when you walk.
Why Timely Replacement is Important:
- Protects the heel block: The heel cap is designed to wear down first. If you allow it to wear completely through, you’ll start damaging the actual heel block itself. Once the heel block is damaged, repairs become much more difficult and expensive, sometimes even impossible to repair properly without replacing the entire heel.
- Maintains balance and stability: A worn or uneven heel cap can throw off your balance, leading to an awkward gait and potential discomfort or injury.
- Reduces noise: A worn heel cap, especially if it exposes the inner metal rod of the heel, can create a loud, annoying clicking sound when you walk.
Recognizing Wear: Regularly inspect your heel caps. If you see them wearing down unevenly, if the plastic or rubber is thinning, or if you can see a metal pin appearing through the center, it’s definitely time for a replacement. This is a simple, inexpensive repair that a cobbler can do in minutes, saving your beautiful heels from significant damage.
Wearing Habits: Mindful Strides for Longevity
How you wear your leather kitten heels has a huge impact on their lifespan. Conscious wearing habits can dramatically reduce wear and tear and extend their life.
Rotation of Shoes: Let Them Breathe
It might be tempting to wear your favorite kitten heels every single day, but this is one of the quickest ways to wear them out. Leather needs to breathe and recover. When you wear shoes, your feet naturally sweat, and this moisture gets absorbed by the leather lining and insole.
Benefits of Rotation:
- Prevents premature wear: Giving your shoes a break allows them to fully dry out and the leather to relax and recover its shape. Wearing them day after day doesn’t give them this crucial recovery time, leading to faster degradation of the leather and internal components.
- Allows for drying: Proper drying prevents bacterial growth (which causes odor) and mildew. It also prevents the leather from becoming overly saturated and weak. Aim to give your shoes at least 24-48 hours to air out between wears.
Avoiding Extreme Conditions: Protect from the Elements
Leather is a natural material, and like your skin, it reacts to environmental conditions.
- Heavy Rain: Water is leather’s nemesis. While a good protectant spray helps, prolonged exposure to heavy rain can saturate the leather, leading to discoloration, stiffness, and even cracking as it dries. If they do get wet, dry them properly (more on that later).
- Excessive Heat: Direct heat sources like radiators, fireplaces, or strong sunlight can dry out leather very quickly, causing it to shrink, crack, and lose its natural oils. Never leave leather shoes in a hot car.
- Direct Sunlight: Prolonged exposure to direct sunlight can fade the color of your leather and dry it out.
- Humidity: While not as damaging as direct heat, consistently high humidity can encourage mold or mildew growth if shoes are stored improperly. Conversely, very low humidity can dry out leather.
Navigating Different Surfaces: Watch Your Step
Kitten heels, with their slender heels and often delicate uppers, are not designed for rough terrain.
- Gravel and Uneven Pavement: These surfaces are a prime cause of scuffs, scrapes, and damage to both the leather upper and the heel. Small stones can nick the leather, and uneven ground puts undue stress on the heel block and tip.
- Grates and Cracks: Be especially careful when walking over sidewalk grates, cobblestones, or large cracks. The narrow heel can easily get caught, leading to a nasty trip or, more commonly, a broken or severely damaged heel.
By being mindful of where you walk, rotating your shoes, and protecting them from harsh conditions, you significantly extend their life and keep them looking impeccable.
The Art of Cleaning: Gentle Yet Effective Techniques
Cleaning your leather kitten heels isn’t just about making them look good; it’s about removing dirt, grime, and environmental pollutants that can degrade the leather over time. A clean surface is also essential for any subsequent conditioning or polishing treatments to be effective.
Daily Maintenance: Wiping Away the Day
The easiest and most impactful cleaning habit is daily maintenance. Just a minute or two after each wear can prevent dirt from building up and becoming embedded in the leather.
- Soft Cloth Dusting: For smooth leathers (full-grain, top-grain, patent), a simple wipe-down with a soft, clean, dry cloth (like a microfiber cloth or an old cotton t-shirt) is often enough. This removes surface dust, light scuffs, and any loose dirt before it has a chance to set. This prevents the abrasive action of accumulated grime from slowly wearing down the leather’s surface.
- Gentle Brushing for Suede/Nubuck: For napped leathers, a specialized suede brush is indispensable. After each wear, gently brush the surface in one direction to remove dust and dirt and to restore the nap. Don’t use a regular shoe brush on suede or nubuck, as it can damage the delicate fibers. The bristles on a suede brush are designed to lift and clean the nap without flattening or tearing it.
Deep Cleaning: When and How
Daily maintenance keeps things tidy, but eventually, your shoes will need a more thorough deep clean to remove stubborn dirt, built-up grime, or specific stains. The approach varies significantly depending on the type of leather.
General Leather (Full-Grain, Top-Grain): The Workhorse Leathers
These leathers are more forgiving than suede but still require gentle treatment.
- Mild Leather Cleaner: Always use a pH-neutral leather cleaner specifically formulated for footwear. Household soaps or detergents are often too harsh; their alkaline properties can strip natural oils from the leather, leading to dryness, cracking, and discoloration.
- Application: Apply a small amount of cleaner to a clean, soft cloth to create a foam. Gently wipe down the entire leather surface in small, circular motions. The foam helps lift dirt without saturating the leather.
- Removal: Wipe off any excess cleaner with a separate, clean, damp cloth. Then, buff the area dry with another clean cloth. Allow the shoes to air dry completely in a cool, well-ventilated area, away from direct heat.
- Removing Surface Dirt and Grime: For general dirt, the mild cleaner and cloth method is effective. The cleaner’s surfactants emulsify dirt and oils, allowing them to be wiped away.
- Spot Cleaning: Specific Stain Removal:
- Ink Stains: For fresh ink, try a specialized leather ink remover (test first!). For older stains, it can be very difficult. Sometimes, a cotton swab lightly dampened with rubbing alcohol (very cautiously, test first, and condition immediately after) can work, but this is a last resort and can damage the finish.
- Oil/Grease Stains: Sprinkle the stain with an absorbent powder like cornstarch or talcum powder. Let it sit for several hours or overnight to absorb the oil, then brush it off gently. Repeat if necessary. The powder acts like a sponge, drawing the oil out of the leather pores.
- Salt Stains (Winter): Salt stains appear as white, powdery streaks, especially common in winter. Mix equal parts white vinegar and water. Dampen a clean cloth with this solution and gently wipe the affected areas. The acetic acid in the vinegar neutralizes the salt. Follow up with a plain damp cloth and then dry thoroughly and condition the leather.
Suede and Nubuck Specifics: Handle with Care
These napped leathers are delicate and require a different approach.
- Suede Brush and Eraser: Your primary tools for daily cleaning are a suede brush (with brass or nylon bristles) and a suede eraser (which looks like a rubber block).
- Technique: Use the brush to gently remove loose dirt and to lift the nap. For scuffs or stubborn marks, use the suede eraser. Rub the eraser gently over the mark, just like you would erase a pencil mark. The eraser friction helps lift the dirt. Then, use the brush to restore the nap.
- Raising the Nap: After cleaning, brush the nap in one direction to make it look uniform and soft.
- Specialized Suede Cleaners: For deeper stains, use suede-specific cleaning sprays or foams. These are designed to clean without saturating the delicate material. Follow product instructions carefully, typically by spraying lightly and then blotting with a clean cloth.
- Avoiding Water Submersion: Never ever soak suede or nubuck shoes in water. Water can permanently alter their texture, cause shrinking, and leave unsightly stains.
Patent Leather Peculiarities: The Glossy Finish
Patent leather is the easiest to clean but requires care to maintain its shine.
- Damp Cloth Cleaning: Most dirt and smudges can be removed with a soft cloth dampened with plain water and a tiny drop of mild hand soap. Gently wipe the surface.
- Avoiding Harsh Chemicals: Never use abrasive cleaners, alcohol, or anything that could dull or scratch the glossy coating. This includes shoe polishes designed for traditional leather, as they will leave a greasy film.
- Dealing with Scuffs on Patent: Minor scuffs on patent leather are often surface marks on the plastic coating.
- Petroleum Jelly: Apply a tiny dab of petroleum jelly to a soft cloth and gently rub it over the scuff. The oils can help fill in and temporarily mask the abrasion. Wipe off any excess.
- Non-Gel Toothpaste: A very small amount of non-gel toothpaste (not abrasive, test first!) applied to a soft cloth can sometimes gently buff out minor scuffs. Use a light touch and wipe clean immediately.
Always let your shoes air dry completely after any cleaning process, and avoid direct heat or sunlight which can damage the leather.
Conditioning for Suppleness: Nurturing the Leather Fibers
Cleaning removes surface impurities, but conditioning is about nourishing the leather itself. Leather, like skin, can dry out over time, especially with exposure to air, sunlight, and everyday wear. Conditioning replenishes its natural oils, maintaining its flexibility, preventing cracks, and keeping it looking vibrant.
Why Conditioning is Essential
Leather is essentially animal hide, and when it’s processed, its natural moisture and oils are partially lost. Over time, further exposure to the environment causes it to dry out, leading to several problems:
- Preventing Dryness, Cracking, and Stiffness: Dry leather loses its pliability. It becomes stiff and brittle, making it susceptible to cracking, especially in areas that flex, like the vamp (the part over the foot) or where the upper meets the sole. Conditioning helps to keep the fibers supple and resilient, preventing these damaging effects.
- Restoring Natural Oils: Conditioners are formulated with natural oils (like lanolin, mink oil, or various plant-based oils) and waxes that penetrate the leather’s fibers. This process rehydrates the leather, restoring the internal lubrication that allows its fibers to move smoothly without friction or breakage. This also helps maintain the leather’s natural color and depth.
- Maintaining Flexibility: Supple leather is comfortable leather. Conditioning ensures the shoes mold to your feet over time without becoming rigid or uncomfortable. This flexibility is crucial for the longevity of the shoe’s structure.
Types of Leather Conditioners
The market offers various types of leather conditioners, each with slightly different properties. Choosing the right one depends on your leather type and desired outcome.
- Cream Conditioners: These are perhaps the most common and versatile. They have a consistency similar to a thick lotion and are typically rich in moisturizing ingredients like lanolin, mink oil, or other natural and synthetic oils.
- Benefits: Cream conditioners deeply moisturize, providing excellent nourishment for full-grain and top-grain leathers. They can also offer a light shine and some minor water resistance due to their wax content. They are excellent for restoring the natural feel and flexibility of the leather.
- Liquid Conditioners/Oils: These are thinner in consistency, sometimes resembling an oil. They tend to penetrate leather more quickly than creams.
- Benefits: Good for lighter conditioning or for leather that isn’t excessively dry. They can be applied quickly and are less likely to leave residue if buffed properly. They are often a good choice for fine, delicate leathers where you want to avoid any potential buildup.
- Waxes/Balms: These are usually solid or semi-solid at room temperature and have a higher wax content (e.g., beeswax, carnauba wax).
- Benefits: Waxes offer good protection against water and scuffs, and they can produce a higher shine when buffed. They provide a more robust protective layer on the surface. They are often used after a cream or liquid conditioner to seal in the moisture and provide an extra layer of defense.
- Special Note for Suede/Nubuck: Traditional cream, liquid, or wax conditioners are a strict no-go for suede and nubuck. Their oily nature will flatten the nap, alter the texture, and permanently stain these delicate leathers. For suede and nubuck, focus on specialized protective sprays and dry cleaning methods.
Application Techniques
Proper application is key to effective conditioning.
- Patch Test (Always!): Before applying any conditioner to your entire shoe, always, always test it on a small, inconspicuous area (like the inside of the tongue or a hidden seam). This allows you to check for any adverse reactions, such as discoloration or changes in texture.
- Clean Surface: Ensure your shoes are thoroughly clean and dry before conditioning. Conditioner applied over dirt will just trap the dirt in, and it won’t properly penetrate soiled leather.
- Small Amounts: Apply a small, pea-sized amount of conditioner to a clean, soft cloth. A little goes a long way. Over-applying can lead to a sticky residue or overly saturated leather.
- Gentle Rubbing: Gently rub the conditioner into the leather in small, circular motions. Work in sections, ensuring even coverage. The warmth generated from rubbing helps the conditioner penetrate the leather fibers.
- Allowing Absorption: Let the conditioner sit on the leather for 5-10 minutes (or as per product instructions) to allow it to fully absorb. You might even see the leather darken slightly as it rehydrates.
- Buffing Off Excess: After absorption, use a separate clean, dry soft cloth to gently buff off any excess conditioner. This removes residue and helps restore the natural sheen of the leather. If you leave excess conditioner on, it can attract dust and leave a dull, greasy film.
- Frequency: The frequency of conditioning depends on several factors:
- Climate: In dry climates, leather will dry out faster and need more frequent conditioning.
- Wear: Shoes worn frequently will need more conditioning than those worn rarely.
- Leather Type: More porous leathers might absorb conditioner faster.
- General Rule: A good rule of thumb is to condition your smooth leather kitten heels every 1-3 months, or whenever the leather starts to look dull, feel stiff, or show signs of dryness.
By regularly conditioning your leather kitten heels, you’re not just making them look better; you’re preserving the structural integrity of the leather itself, significantly contributing to its longevity.
Polishing for Brilliance: Restoring Shine and Color
Once your leather kitten heels are clean and conditioned, polishing brings them back to life, restoring their original luster and helping to cover minor imperfections. Polishing not only enhances their appearance but also adds another layer of protection.
When to Polish
Polishing should always be done after you’ve thoroughly cleaned and conditioned your leather shoes. If you polish dirty or unconditioned leather, you’re essentially sealing in grime or applying polish to dry, thirsty fibers that won’t properly absorb it.
- After cleaning and conditioning: This ensures a clean, nourished surface ready to receive the polish evenly.
- To restore luster and cover minor scuffs: Polishing fills in tiny abrasions and refreshes the color, making scuffs less noticeable and bringing back the shoe’s vibrant appearance.
Types of Polishes
Similar to conditioners, different types of polishes offer varying levels of shine and protection.
- Cream Polishes: These are often a blend of waxes, oils, and pigments. They have a softer consistency than wax polishes and are excellent for everyday use.
- Benefits: Cream polishes are nourishing, as they contain some conditioning agents. They provide a good, natural-looking shine and are effective at restoring color and blending minor scuffs. They are generally easier to apply and buff than wax polishes.
- Wax Polishes: These polishes have a higher concentration of hard waxes (like carnauba or beeswax) and less oil. They are often solid in a tin.
- Benefits: Wax polishes offer a higher, more durable shine, sometimes capable of achieving a mirror-like “spit shine” with proper technique. They also provide superior water resistance due to the wax barrier. However, they can build up over time and may dry out the leather if used exclusively without prior conditioning.
- Neutral vs. Colored Polish:
- Neutral Polish: This is clear and suitable for any color of leather. It provides shine and protection without adding pigment. Use it when you don’t need to restore color or blend scuffs, or if you’re unsure of the exact color match.
- Colored Polish: Contains pigments that match specific leather colors. Use this to deepen the existing color, cover minor scuffs, and restore uniformity to faded areas. Always try to match the polish color as closely as possible to your shoes. If you can’t find an exact match, a slightly lighter shade is generally safer than a darker one to avoid discoloration.
The Polishing Process
Achieving a brilliant shine requires patience and the right technique.
- Clean Surface: Start with shoes that are already clean and dry from previous steps. Any dirt or dust will be trapped under the polish.
- Apply Thin, Even Coat:
- Using a soft cloth (like an old t-shirt or a dedicated polish applicator), pick up a small amount of polish.
- Apply it to the leather in small, circular motions, working in small sections.
- The key is to apply a very thin and even layer. Too much polish can build up, create streaks, and make buffing difficult. For wax polish, less is definitely more.
- Allow to Dry: Let the polish dry to a haze. This usually takes 5-10 minutes, depending on the polish type and humidity. This allows the solvents in the polish to evaporate and the waxes to set.
- Buff with a Horsehair Brush: Once the polish is hazy, take a clean, natural horsehair brush. Horsehair bristles are ideal because they are soft enough not to scratch the leather but firm enough to generate friction and create shine.
- Brush vigorously across the entire surface of the shoe using quick, sweeping strokes. You’ll see the haze disappear and the shine emerge.
- Final Buff with a Soft Cloth: For an extra gleam, finish by buffing with a clean, soft microfiber cloth or a polishing cloth. This removes any remaining streaks and enhances the shine further. Use rapid, light motions.
- Achieving a Mirror Shine (Optional): For a high-gloss, mirror-like finish (often desired for dress shoes, but can be done on kitten heels), you’ll need wax polish and a bit more technique. This involves applying multiple very thin layers of wax polish, buffing between each layer, and often using a tiny drop of water (or spit, traditionally) on the cloth during the final buffing stages to create an even higher luster. This technique is more advanced and requires practice, primarily due to the “glazing” effect achieved by dissolving the outermost layer of wax with minimal moisture and then setting it with friction.
Regular polishing not only makes your leather kitten heels look their best, but the waxes and oils in the polish add an additional protective layer against moisture and minor scuffs, extending the life and beauty of your footwear.
Addressing Common Issues: Timely Repairs and Solutions
Even with the best preventive care, your leather kitten heels might encounter common issues like scuffs, water damage, or general wear. Knowing how to address these problems promptly can save your shoes from irreversible damage and extend their usable life.
Scuffs and Minor Abrasions
Scuffs are almost inevitable, especially on leather shoes. The good news is that many minor scuffs can be effectively managed at home.
- Using Matching Polish or Leather Balm: For light surface scuffs that haven’t broken through the leather’s finish, a high-quality shoe polish or a dedicated leather balm can often work wonders.
- Technique: Choose a polish that closely matches the color of your shoes. Apply a small amount of polish or balm directly to the scuff with a clean cloth. Gently rub it in small circular motions. The pigments and waxes in the polish will help fill in the scratch, blend the color, and make the scuff much less noticeable. Finish by buffing the entire shoe.
- How it works: The fine pigments and waxes in the polish fill the microscopic valleys created by the scuff, reflecting light evenly again and restoring the perceived color.
- Fine-Grit Sandpaper (Extreme Caution/Avoid for Most Users): This is a highly specialized and risky technique and should generally be avoided by most users. In very rare cases, for deep scuffs on very specific types of tough, durable full-grain leather, a professional cobbler might use extremely fine-grit sandpaper (e.g., 2000-grit or higher) to very, very gently sand down the raised edges of a deep scuff. This is done with extreme precision to level the surface. However, doing this incorrectly will permanently damage the leather’s finish and is almost never recommended for delicate kitten heels. It can remove the top layer of leather, which is very difficult to restore.
- Leather Filler for Deeper Damage (Small Areas): For small, deeper gouges where the leather fibers are truly damaged (not just a surface scuff), specialized leather fillers can be used. These are paste-like compounds that are tinted to match the leather.
- Application: Clean the area, apply a tiny amount of filler, level it with a spatula or finger, let it dry, and then sand lightly if needed. Follow up with polish.
- Caution: Leather fillers are best for very small, localized damage. They require a steady hand and can be difficult to blend seamlessly, especially on kitten heels where the leather is often fine and the curves are pronounced. For larger or more complex damage, a professional repair is always better.
Water Damage and Stains
Water is one of leather’s biggest enemies. If your kitten heels get wet, quick and correct action is vital to prevent permanent damage.
- Immediate Action: Blotting, Never Rubbing: If your shoes get wet, immediately blot the excess water with a clean, dry, absorbent cloth. Do not rub, as rubbing can spread the water, push it deeper into the leather, or damage the finish. Blot gently to absorb as much moisture as possible from the surface.
- Drying Properly: Shoe Trees, Away from Direct Heat:
- Maintain Shape: Once blotted, insert cedar shoe trees into your heels. Cedar shoe trees absorb residual moisture, help to deodorize the shoes, and, most importantly, maintain the shoe’s original shape as it dries, preventing warping, curling, or shrinking. If you don’t have shoe trees, stuff the toes gently with acid-free tissue paper or newspaper (avoid regular newspaper as the ink can transfer).
- Air Dry: Place the shoes in a cool, well-ventilated area, away from direct heat sources (like radiators, hair dryers, or direct sunlight). Direct heat will dry the leather too quickly and unevenly, causing it to become stiff, brittle, crack, and potentially shrink irreversibly. Always allow them to dry naturally for at least 24-48 hours.
- Removing Water Stains: Even after proper drying, water lines or stains might appear.
- For light water stains on smooth leather: Lightly dampen a clean cloth with distilled water and gently wipe the entire affected area evenly. This helps to “feather” the water line, making it less noticeable. Then, let it air dry again with shoe trees.
- For more stubborn stains or if the leather feels stiff: After drying, apply a high-quality leather conditioner. The conditioner will help rehydrate the dried-out fibers and can sometimes help blend the appearance of the water stain. Repeat conditioning if needed.
Stretching Tight Kitten Heels
New leather shoes, especially heels, can sometimes feel a bit tight. Leather does stretch with wear, but if they’re uncomfortably tight, you can safely stretch them a little.
- Shoe Stretchers: These are mechanical devices, often made of wood or plastic, that can be inserted into the shoe and expanded to gently stretch specific areas (like the toe box or width).
- Types: There are two-way stretchers (for length and width) and spot stretchers (for bunions or specific pressure points).
- Application: Insert the stretcher, adjust it to apply gentle pressure, and leave it in for at least 24-48 hours, or longer if needed. Check the fit periodically.
- Professional Stretching: If you’re hesitant to stretch them yourself, or if the shoes are particularly valuable or made of delicate leather, a professional cobbler can stretch them for you using specialized equipment. They have the expertise to stretch without damaging the shoe.
- Liquid Shoe Stretchers: These sprays contain alcohol or other chemicals that temporarily relax the leather fibers, making them more pliable and receptive to stretching.
- Application: Spray lightly on the inside of the tight areas, then immediately wear the shoes or insert a shoe stretcher. The combination of the chemical relaxation and pressure will help the leather conform.
- Caution: Always test liquid stretchers on an inconspicuous area first, as they can sometimes alter the color or finish of certain leathers. Ensure good ventilation.
Replacing Worn Heel Taps and Soles
These components take the brunt of walking and are designed to be replaceable. Ignoring them leads to more costly damage.
- Recognizing Signs of Wear:
- Heel Taps: If the plastic or rubber tip is significantly worn down, uneven, or if you can see a metal pin protruding, it’s time for replacement. Waiting too long means the wear transfers to the main heel block.
- Soles: If the original leather sole is worn thin in areas, if holes are appearing, or if the stitching is fraying badly, it’s time to consider sole protection or replacement.
- DIY vs. Professional Cobbler:
- DIY Heel Taps (Minor): For very simple, press-in heel taps, you might find replacement kits online. However, many kitten heels have very narrow, often glued-on taps that require specialized tools and expertise to replace without damaging the delicate heel.
- Professional Cobbler (Recommended for most): For both heel tap replacement and sole replacement/protection, a skilled cobbler is highly recommended. They have the right tools, materials, and experience to perform these repairs cleanly and correctly, ensuring the shoe’s structure isn’t compromised. They can remove the old tap without damaging the heel block, and attach new, durable ones. For soles, they can expertly apply new rubber half-soles or completely re-sole the shoe if necessary.
- Importance of Early Replacement: Replacing worn heel taps and adding sole protection early is a small investment that prevents much larger, more expensive repairs or even the complete loss of your favorite kitten heels. Don’t wait until the damage is severe.
By proactively addressing these common issues, you can keep your leather kitten heels looking their best and performing well for many years to come.
Storage Savvy: Preserving Shape and Preventing Damage
Proper storage is arguably just as important as cleaning and conditioning in extending the lifespan of your leather kitten heels. How and where you store your shoes directly impacts their shape, the integrity of the leather, and their overall appearance. Think of storage as the resting phase where your shoes recover and stay pristine.
Cleanliness Before Storage
This is a non-negotiable rule: Never store dirty shoes. Any dirt, dust, or moisture left on the leather when stored can lead to permanent stains, mold growth, unpleasant odors, or even degrade the leather fibers over time. Before putting your kitten heels away for any extended period, always ensure they are:
- Thoroughly cleaned: Wipe away any surface dust, dirt, or scuffs.
- Completely dry: Ensure there is absolutely no moisture on or within the shoes, including residual moisture from your feet. Allow them to air dry for at least 24 hours after wear, even if you just wore them casually.
Maintaining Shape
One of the biggest enemies of shoes in storage is losing their shape. Leather can crease, wrinkle, or flatten if not properly supported, leading to permanent damage.
- Shoe Trees: The Ultimate Shape Keepers:
- Cedar Shoe Trees: These are the gold standard for leather shoes. They are made from untreated cedarwood, which has excellent moisture-absorbing properties. This helps to wick away any lingering internal moisture (from sweat, for example), preventing odor and bacterial growth. Cedar also has a natural, pleasant scent that acts as a mild deodorizer and can deter pests.
- Plastic Shoe Trees: While not offering the moisture-wicking and deodorizing benefits of cedar, plastic shoe trees are still effective at maintaining the shoe’s shape and preventing creasing. They are a more economical option.
- How they work: Shoe trees gently fill out the shoe from the inside, mimicking the foot’s shape, and exerting subtle pressure that smooths out creases that form during wear. They keep the toe box structured and the vamp smooth. Always insert shoe trees immediately after taking your shoes off, while the leather is still warm and slightly pliable.
- Stuffing with Acid-Free Tissue Paper: If you don’t have shoe trees, or for shoes where shoe trees don’t fit perfectly (e.g., very delicate heels), gently stuff the toes of your kitten heels with acid-free tissue paper.
- Why Acid-Free? Regular newspaper ink can transfer to light-colored leather, and its acidic nature can eventually degrade leather over very long periods. Acid-free tissue paper is neutral and safe.
- Technique: Stuff firmly enough to support the toe box and prevent creasing, but not so tightly that it stretches the leather or distorts the shoe’s silhouette. This method helps maintain the shoe’s structure.
Ideal Storage Environment
The environment where your shoes are stored plays a crucial role in their long-term preservation.
- Cool, Dry, Dark Place: This is the trifecta for leather storage.
- Cool: Extreme temperatures, especially heat, can dry out leather, making it stiff and brittle, leading to cracking.
- Dry: Humidity can lead to mold and mildew growth, which can permanently stain and degrade leather. Conversely, excessively dry conditions can also dry out the leather. A consistent, moderate humidity level is ideal.
- Dark: Direct sunlight causes leather to fade and can accelerate drying and cracking.
- Avoid Basements/Attics: These areas often experience significant temperature and humidity fluctuations, making them less than ideal for long-term leather shoe storage.
- Breathable Shoe Bags: Cotton or Felt: Store your kitten heels in breathable shoe bags. These are typically made of cotton flannel or felt.
- Benefits: Shoe bags protect your shoes from dust, dirt, and light exposure. Crucially, their breathable material allows air circulation, preventing moisture buildup that can lead to mold or odor. Never store leather shoes in non-breathable plastic bags or containers, as this traps moisture and creates a breeding ground for mildew.
- Original Boxes (with caveats): If your shoes came in their original boxes, these can be good for storage, provided they are made of sturdy, breathable cardboard.
- Important: If the box is sealed or non-breathable, or if the shoes were tightly packed in plastic, transfer them to breathable bags inside the box. Ensure there’s enough space for air circulation. Consider adding a sachet of silica gel (not touching the leather directly) if humidity is a concern, but replace it periodically.
Avoiding Crushing and Deforming
The slender nature of kitten heels makes them particularly susceptible to damage from improper physical storage.
- Storing Upright, Not Stacked: Always store your kitten heels upright, either on a shoe rack, in individual shoe boxes, or in cubbies. Never stack them on top of each other. Stacking can crush the delicate heel, deform the upper, and cause permanent creasing or flattening of the toe box.
- Dedicated Shoe Storage: Invest in shoe racks, cubby shelves, or shoe bins that allow each pair to have its own space, preventing them from being squashed or damaged by other shoes.
By implementing these smart storage practices, you’re giving your leather kitten heels the best chance to maintain their beauty, shape, and integrity for decades to come, truly making them last a lifetime.
When to Call a Professional: The Cobbler’s Expertise
While many aspects of leather kitten heel care can be handled at home with the right tools and knowledge, there are times when a professional cobbler’s expertise is not just helpful, but essential. Recognizing these moments is key to preventing further damage and ensuring your beloved shoes receive the specialized attention they deserve.
Recognizing Limitations of DIY
It’s tempting to try to fix everything yourself, but leather is a natural material that can be unforgiving if mishandled. Attempting complex repairs without the proper tools, materials, or experience can often worsen the problem, making professional repair more difficult or even impossible.
- Complex Repairs: Some issues go beyond surface-level cleaning or minor scuff repair.
- Structural Damage: This includes a wobbly or broken heel block, torn seams, or severe damage to the shoe’s basic framework. A cobbler has the specialized equipment and skills to re-attach, reinforce, or even replace structural components without compromising the shoe’s integrity or appearance. They understand shoe construction (e.g., Blake stitch, Goodyear welt) and can repair accordingly.
- Re-soling: If your outsoles are completely worn through or have major holes, a full re-soling (replacing the entire sole) is a job for a professional. They can skillfully remove the old sole and attach a new one, often upgrading it with a more durable material like rubber. This process often involves specialized stitching machines and adhesives that aren’t available to the average person.
- Major Heel Issues: Beyond simple heel tap replacement, if the heel block itself is scuffed, gouged, or loose, a cobbler can repair, re-wrap, or completely replace the heel. This often requires precise cutting and shaping of new materials.
- Specialized Cleaning/Restoration: For deeply ingrained stains, significant water damage, color fading, or general deterioration that goes beyond simple cleaning and conditioning, a cobbler specializing in leather restoration can work wonders. They have access to industrial-grade cleaning solutions, specialized dyes, and techniques to bring leather back to life without damaging it. For example, treating a complex mold infestation on leather is far beyond a DIY task.
- Leather Recoloring: If you want to change the color of your leather kitten heels entirely, or if the original color has faded significantly, a professional cobbler can expertly strip the old finish and dye the leather a new color. This is a complex process that requires even application of dyes and sealants to ensure an even, long-lasting finish, something very difficult to achieve uniformly at home.
Value of a Skilled Cobbler for Extending Shoe Life
A skilled cobbler is more than just a shoe repair person; they are artisans who understand the intricacies of shoe construction and leather properties. Their expertise can truly extend the life of your shoes in ways you cannot.
- Precision and Expertise: Cobblers use specialized tools (e.g., shoe lasts, industrial sewing machines, grinding wheels) and techniques developed over years of apprenticeship. They know how to work with different leather types, select the correct adhesives, and perform repairs that are both durable and aesthetically pleasing.
- Access to Quality Materials: Professionals have access to higher-grade replacement materials for soles, heels, and linings than are typically available to consumers. This means their repairs are often more robust and longer-lasting than DIY attempts.
- Preventative Advice: A good cobbler can also offer valuable advice on preventative care, recommend the best products for your specific shoes, and identify potential issues before they become major problems. For example, they might suggest adding sole guards early on or point out uneven wear on a heel cap that you missed.
- Investment Protection: Considering the cost of high-quality leather kitten heels, investing in professional repairs when needed is far more cost-effective than replacing the shoes entirely. A timely repair by a cobbler can add years, even decades, to the life of your footwear.
Don’t hesitate to seek professional help for any repair that feels beyond your skill level or for any significant damage. Your cobbler can be your best friend in ensuring your leather kitten heels truly last a lifetime.
Common Mistakes to Avoid in Leather Kitten Heel Care
While understanding the best practices is essential, knowing what not to do can be just as crucial. Avoiding these common mistakes will prevent unintentional damage and ensure your leather kitten heels remain beautiful and durable for years to come.
- Using Harsh Chemicals (e.g., Household Cleaners): This is one of the most frequent and damaging mistakes. Household cleaning products (like window cleaner, multi-surface sprays, or strong dish soaps) are designed for hard surfaces, not delicate, organic leather.
- Why it’s bad: These cleaners often contain harsh detergents, ammonia, or solvents that will strip the natural oils from the leather, causing it to dry out, become stiff, crack, and potentially discolor permanently. They can also degrade protective finishes. Always use pH-neutral leather-specific cleaners.
- Drying with Direct Heat: When leather gets wet, the instinct might be to dry it quickly with a hair dryer, radiator, or direct sunlight.
- Why it’s bad: Rapid, direct heat causes the water within the leather fibers to evaporate too quickly. This leads to the fibers shrinking and becoming brittle, resulting in irreversible cracking, warping, and hardening of the leather. It can also cause the leather to shrink excessively. Always air dry in a cool, well-ventilated area with shoe trees inserted.
- Over-Conditioning or Under-Conditioning: Like anything, there’s a balance.
- Over-conditioning: Applying too much conditioner or conditioning too frequently can saturate the leather, making it greasy, attracting dust, and potentially leading to a sticky residue. It can also make the leather overly soft and lose its structural integrity.
- Under-conditioning: Not conditioning enough, or using too little product, leaves the leather dry and susceptible to cracking and stiffness.
- Balance: Aim for a “just right” approach – condition when the leather looks dull or feels dry, typically every 1-3 months for regularly worn shoes.
- Neglecting Heel Taps: This tiny component is often overlooked until it’s too late.
- Why it’s bad: Allowing heel taps to wear down completely exposes the underlying heel block (the main structure of the heel). Once the hard plastic or wood of the heel block begins to wear, it can be expensive and difficult to repair, and in some cases, the damage can be irreparable, meaning you might have to discard the shoes. Always replace heel taps promptly at the first sign of significant wear.
- Improper Storage: Stuffing shoes into a cluttered closet or storing them in non-breathable containers.
- Why it’s bad: Improper storage can lead to crushed uppers, deformed shapes, permanent creases, and potentially mold or mildew if stored in humid, unventilated conditions. Always use shoe trees, breathable bags, and store in a cool, dry, dark, and spacious area.
- Not Rotating Shoes: Wearing the same pair of leather kitten heels day after day.
- Why it’s bad: This prevents the leather from fully drying out from foot perspiration and doesn’t allow the fibers to rest and recover their shape. Consistent wear without a break leads to faster breakdown of the leather, stitching, and internal components, drastically shortening the shoe’s lifespan. Give your shoes at least 24 hours (preferably 48) between wears.
- Using the Wrong Products for Suede/Nubuck: Treating suede or nubuck like smooth leather.
- Why it’s bad: Applying traditional leather conditioners, polishes, or even too much water to napped leathers will flatten the nap, cause permanent staining, and ruin their unique texture. Always use products specifically formulated for suede and nubuck, such as specialized brushes, erasers, and spray cleaners.
By consciously avoiding these common pitfalls, you can ensure your leather kitten heels receive the respectful and appropriate care they deserve, contributing significantly to their ability to last a lifetime.
Conclusion
Caring for your leather kitten heels isn’t just a chore; it’s an investment in their longevity and an act of appreciation for their timeless style. From the moment you bring them home, a proactive approach to maintenance will ensure these elegant shoes remain a cherished part of your wardrobe for many years, truly lasting a lifetime.
Remember the core principles: prevention, consistent cleaning, nourishing conditioning, brilliant polishing, smart storage, and timely repairs. Start with initial protection against water and stains, and consider reinforcing the soles and heel tips. Establish a routine of daily wiping and periodic deep cleaning tailored to your leather type. Always follow up with conditioning to keep the leather supple and polished to restore its luster and add an extra layer of defense. When not in use, store your heels with shoe trees in breathable bags in a cool, dry place to maintain their shape and prevent environmental damage. And finally, don’t hesitate to seek the skilled hands of a professional cobbler for any repairs that are beyond your DIY capabilities.
By integrating these practices into your routine, you’re not just maintaining a pair of shoes; you’re preserving an accessory that adds grace and confidence to every step. Your leather kitten heels are designed to be loved and admired, and with dedicated care, they will continue to do so for decades to come.